安卓开发学习笔记
基础部分
创建项目
创建项目的时候先选择模板,不同的模板会有不同的预设。
这是google官方写的几个模板。

其中特别要说的是,如果选的是这个empty activity,就只能使用kotlin语言

在学校推荐使用如下模板,因为可以切换语言

安卓项目目录结构
.gradle和.idea是编译后生成的文件,编译后自动生成,一般情况下不需要去动。

gradle文件夹 主要就是配置gradle的版本。
首先他会寻找本地是否有该gradle版本,如果没有的话就回去网络上下载。

app是我们的主要战场,基本上的开发都是在这个目录下面进行的。
上面其实说的非常不清晰,但是下面我们切换到安卓模式重新认识一次
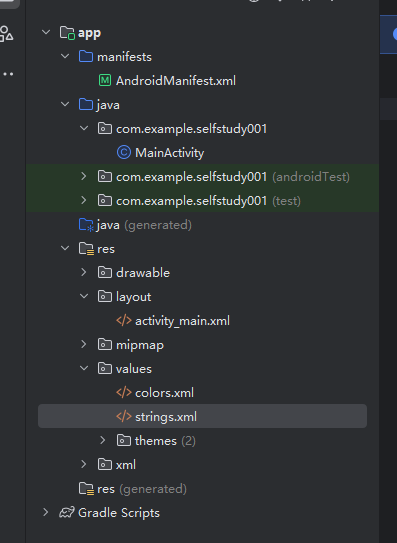
直接来看这个列表,首先最上面的manifest是整个项目的一些配置文件,java下面第一个文件夹是我们写的所有java文件
下面两个test文件夹都是用于编写测试用例的
再往下是自动生成的java文件夹 ,估计是jvm虚拟机的编译产物,所以也先不用管。再往下layout存储的是页面资源,类似前端页面。然后其他的都是一些配置文件,之后在使用的过程中用到再慢慢了解。
gradle整体是一个对软件编译打包的套件,不太需要去了解具体的运行原理。
实战项目开发
对自己的java水平自视甚高
直接实战,就是傲慢
记事本
实现一个带提醒功能的记事本
功能
- 笔记列表
- 提醒模式(定时提醒的笔记)
- 黑夜模式
- 时间倒序
- 按钮外观颜色自定义
- 笔记格式部分自定义
- 搜索功能
适合范围
了解安卓四大组件:Activity,Service,Content Provider,BroadcastReceiver广播接收器 至少了解其中三个
熟悉java ,了解OOP
至少使用过Android Studio新手教程,创建过Hello World项目
想要开发一款安卓应用
实操
关于创建应用和架构以及组件的部分不赘述
编辑笔记功能
修改主页面页面
首先作为记事本,最重要的就是编辑笔记的功能。实现这个功能,首先我们需要一个编辑笔记的页面,然后在java中完成交互。
添加mainifest文件
所有要显示出来的activity文件都需要加入manifest
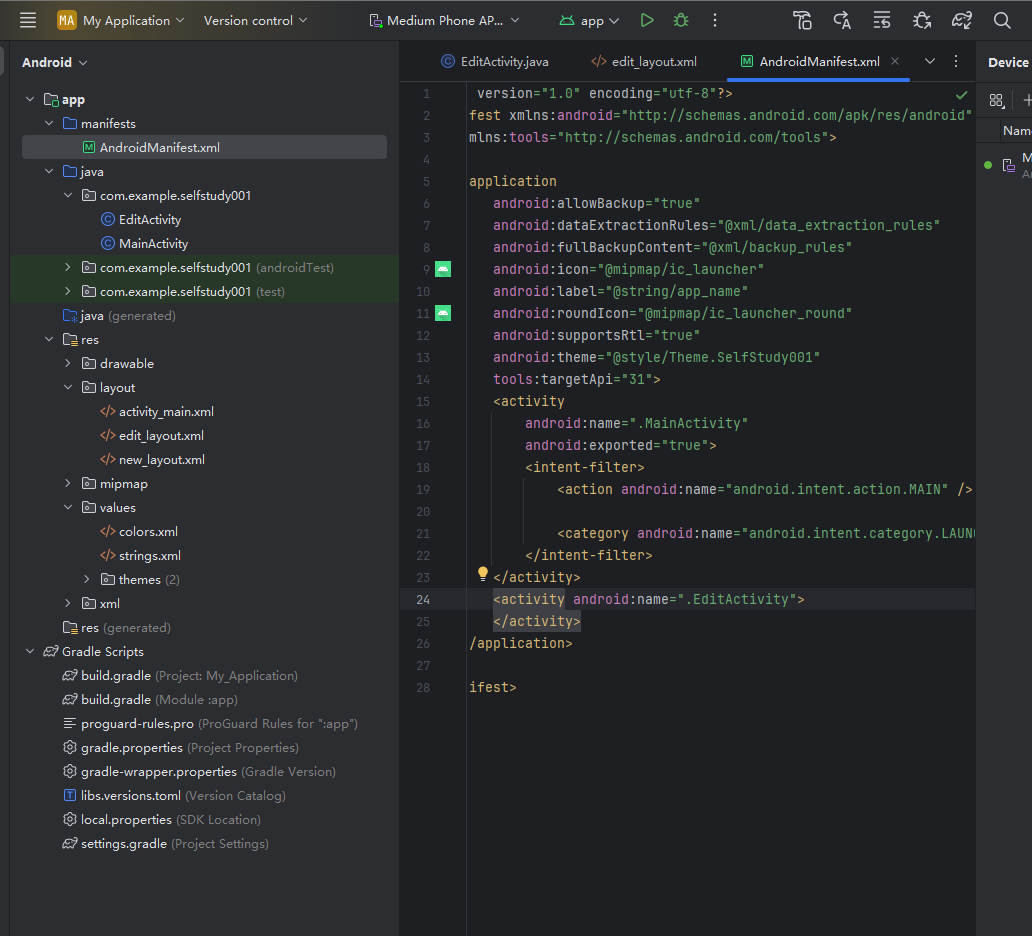
加入如图所示24行代码
1
2
| <activity android:name=".EditActivity">
</activity>
|
然后我们要实现浮动布局,加入浮动的小圆球实现跳转
如果要实现这个浮动小圆球。就一定不能使用容器布局,因为浮动圆球不能随着页面移动,必须浮在页面上方。
这里我们要用到一个相对布局 relativeLayout
修改完了在主界面搜索FloatingActionButton 然后加入一个浮标
然后再主界面xml里面加入图标的依赖
1
2
3
4
5
6
7
8
9
10
11
12
13
14
15
16
17
18
19
20
21
22
23
24
25
26
27
28
29
30
31
32
33
| activity_main.xml
<?xml version="1.0" encoding="utf-8"?>
<RelativeLayout xmlns:android="http://schemas.android.com/apk/res/android"
xmlns:app="http://schemas.android.com/apk/res-auto"
xmlns:tools="http://schemas.android.com/tools"
android:id="@+id/main"
android:layout_width="match_parent"
android:layout_height="match_parent"
tools:context=".MainActivity">
<TextView
android:id="@+id/textView"
android:layout_width="wrap_content"
android:layout_height="wrap_content"
android:text="Hello World!"
android:layout_centerInParent="true" />
<com.google.android.material.floatingactionbutton.FloatingActionButton
android:id="@+id/floatingActionButton"
android:layout_width="wrap_content"
android:layout_height="wrap_content"
android:layout_alignParentEnd="true"
android:layout_alignParentBottom="true"
android:layout_margin="16dp"
android:layout_marginStart="16dp"
android:layout_marginTop="16dp"
android:layout_marginEnd="9dp"
android:layout_marginBottom="43dp"
android:clickable="true"
android:contentDescription="@string/fab_description"
tools:srcCompat="@drawable/baseline_add_24" />
</RelativeLayout>
|
然后还需要给他加一个icon
在下图的位置
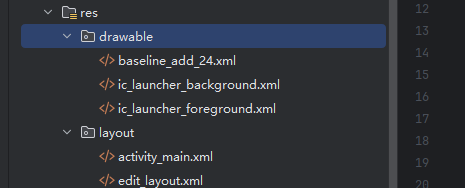
然后在上面的xml中引入(代码中已经引入)
这个设置是看不到的,仅仅只是定位用(我猜的)
这里还是有几个警告其中第一个是namespace未使用 这个之后会用到,先不管他,第二个是说你没有照顾到盲人,难道我开发一个记事本备忘录应用我还要去照顾到盲人,盲人难道不用盲文,不用语音备忘录来用盲文吗?到时候销量排行榜一结算,盲人得了MVP!躺赢狗!你健全的人就是躺赢狗!
接下来基本的设置已经完成,我们可以看一下效果。
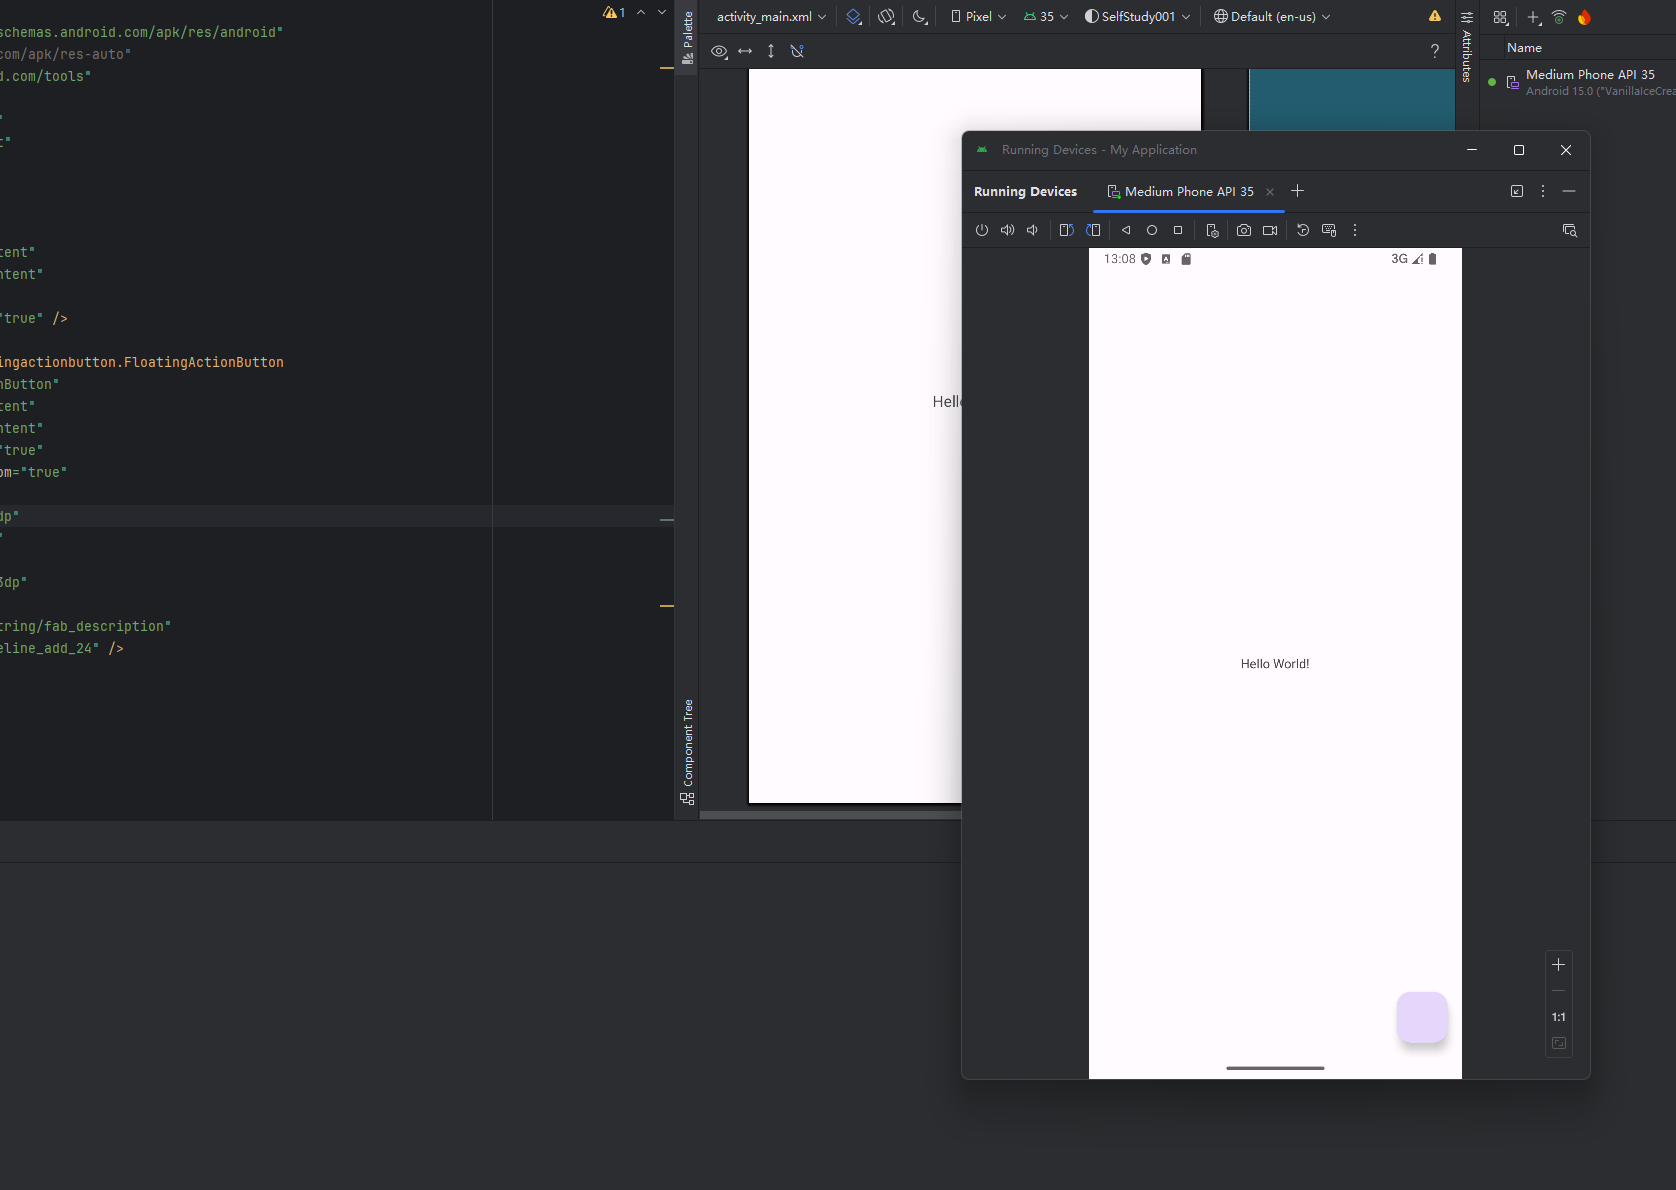
效果一切正常,点击也有样式,然后我们就需要为这个按钮添加点击事件,那么就来到了java的部分
初始化点击事件
EditActivity
1
2
3
4
5
6
7
8
9
10
11
12
13
14
15
16
17
18
19
20
21
22
| package com.example.selfstudy001;
import android.os.Bundle;
import androidx.annotation.Nullable;
import androidx.appcompat.app.AppCompatActivity;
import com.google.android.material.floatingactionbutton.FloatingActionButton;
public class EditActivity extends AppCompatActivity {
EditText et;
@Override
protected void onCreate(@Nullable Bundle savedInstanceState) {
super.onCreate(savedInstanceState);
setContentView(R.layout.edit_layout);
}
}
|
MainActivity
1
2
3
4
5
6
7
8
9
10
11
12
13
14
15
16
17
18
19
20
21
22
23
24
25
26
27
28
29
30
31
32
33
34
35
36
37
38
39
40
41
42
43
44
45
46
47
48
49
50
51
52
53
54
55
| package com.example.selfstudy001;
import android.content.Intent;
import android.os.Bundle;
import android.util.Log;
import android.view.View;
import androidx.activity.EdgeToEdge;
import androidx.appcompat.app.AppCompatActivity;
import androidx.core.graphics.Insets;
import androidx.core.view.ViewCompat;
import androidx.core.view.WindowInsetsCompat;
import com.google.android.material.floatingactionbutton.FloatingActionButton;
public class MainActivity extends AppCompatActivity {
FloatingActionButton btn1;
final String TAG = "test";
@Override
protected void onCreate(Bundle savedInstanceState) {
super.onCreate(savedInstanceState);
EdgeToEdge.enable(this);
setContentView(R.layout.activity_main);
ViewCompat.setOnApplyWindowInsetsListener(findViewById(R.id.main), (v, insets) -> {
Insets systemBars = insets.getInsets(WindowInsetsCompat.Type.systemBars());
v.setPadding(systemBars.left, systemBars.top, systemBars.right, systemBars.bottom);
btn1 = (FloatingActionButton)findViewById(R.id.fab);
btn1.setOnClickListener(new View.OnClickListener() {
@Override
public void onClick(View v) {
Intent intent = new Intent(MainActivity.this, EditActivity.class);
startActivities(new Intent[]{intent});
}
});
return insets;
});
}
}
|
现在上面这两个部分已经编辑好了
首先edit页面主要就是引入浮标。其他目前为止还没有什么功能。
mainactivict界面 首先是把btn引入 然后写了点击事件,实现跳转。
插入文字组件
edit_layout
在这里我们要编辑输入文本页面。相当于是加入一个可以编辑文字的组件,这个组件将作为记事本的核心。
1
2
3
4
5
6
7
8
9
10
11
12
13
14
15
16
| <?xml version="1.0" encoding="utf-8"?>
<LinearLayout xmlns:android="http://schemas.android.com/apk/res/android"
android:layout_width="match_parent"
android:layout_height="match_parent"
android:orientation="vertical">
<EditText
android:layout_width="match_parent"
android:layout_height="match_parent"
android:gravity="top">
</EditText>
</LinearLayout>
|
重设返回键
先防结果 在编辑界面编辑完之后按下返回键返回主页面 ,应用程序自动吧你输入的文字返回
下面是日志文件的截图

要达到这个效果 首先我们要修改主界面,具体的解析我都写在注释里面了
MainActivity
1
2
3
4
5
6
7
8
9
10
11
12
13
14
15
16
17
18
19
20
21
22
23
24
25
26
27
28
29
30
31
32
33
34
35
36
37
38
39
40
41
42
43
44
45
46
47
48
49
50
51
52
53
54
55
56
57
58
59
60
61
62
63
64
65
66
67
68
69
| package com.example.selfstudy001;
import android.content.Intent;
import android.os.Bundle;
import android.util.Log;
import android.view.View;
import androidx.activity.EdgeToEdge;
import androidx.appcompat.app.AppCompatActivity;
import androidx.core.graphics.Insets;
import androidx.core.view.ViewCompat;
import androidx.core.view.WindowInsetsCompat;
import com.google.android.material.floatingactionbutton.FloatingActionButton;
public class MainActivity extends AppCompatActivity {
FloatingActionButton btn1;
final String TAG = "test";
@Override
protected void onCreate(Bundle savedInstanceState) {
super.onCreate(savedInstanceState);
EdgeToEdge.enable(this);
setContentView(R.layout.activity_main);
ViewCompat.setOnApplyWindowInsetsListener(findViewById(R.id.main), (v, insets) -> {
Insets systemBars = insets.getInsets(WindowInsetsCompat.Type.systemBars());
v.setPadding(systemBars.left, systemBars.top, systemBars.right, systemBars.bottom);
btn1 = (FloatingActionButton)findViewById(R.id.fab);
btn1.setOnClickListener(new View.OnClickListener() {
@Override
public void onClick(View v) {
Intent intent = new Intent(MainActivity.this, EditActivity.class);
startActivityForResult(intent,0);
}
});
return insets;
});
}
@Override
protected void onActivityResult(int requestCode,int resultCode,Intent data){
super.onActivityResult(requestCode,resultCode,data);
String edit = data.getStringExtra("input");
Log.d(TAG,edit);
}
}
|
然后我们要写EditActivity
1
2
3
4
5
6
7
8
9
10
11
12
13
14
15
16
17
18
19
20
21
22
23
24
25
26
27
28
29
30
31
32
33
34
35
36
37
38
39
40
41
42
43
44
45
46
47
48
49
| package com.example.selfstudy001;
import android.content.Intent;
import android.os.Bundle;
import android.view.KeyEvent;
import android.widget.EditText;
import androidx.annotation.Nullable;
import androidx.appcompat.app.AppCompatActivity;
import com.google.android.material.floatingactionbutton.FloatingActionButton;
public class EditActivity extends AppCompatActivity {
EditText et;
@Override
protected void onCreate(@Nullable Bundle savedInstanceState) {
super.onCreate(savedInstanceState);
setContentView(R.layout.edit_layout);
et = findViewById(R.id.et);
}
public boolean onKeyDown(int keyCode,KeyEvent event){
if(keyCode == KeyEvent.KEYCODE_HOME){
return true;
}
else if (keyCode == KeyEvent.KEYCODE_BACK)
{
Intent intent = new Intent();
intent.putExtra("input",et.getText().toString());
setResult(RESULT_OK,intent);
finish();
return true;
}
return super.onKeyDown(keyCode,event);
}
}
|
这样通过java文件就实现了上面的功能,虽然看起来好像很简单但是修改bug 的过程很漫长。
总之到这一步我们实际上已经实现了点击悬浮按钮进入编辑页面和点击返回按钮记录编辑页面记录的东西两个部分的功能。
数据库操作和笔记显示
返回编辑结束的文本
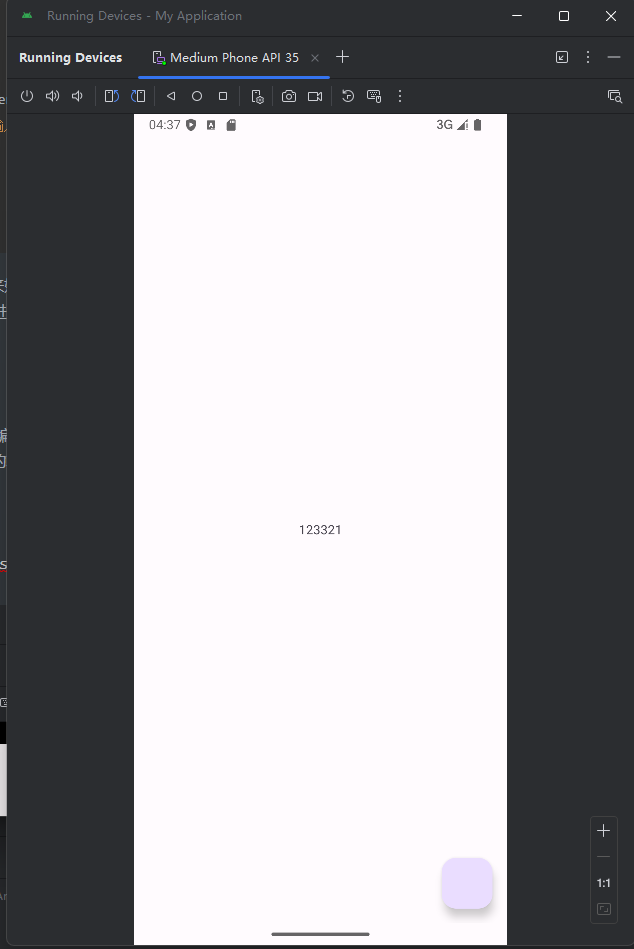
首先稍微修改了一下代码 达到了我现在在编辑页面编辑之后再返回到主页面,程序可以通过onActivityResult接受startActivityForResult的结果,然后替换helloworld的功能
效果:
首先在编辑页面输入123321 然后返回

主页面的helloworld被替换
实现代码
在mainactivity中修改
1
2
3
4
5
6
7
8
9
10
11
12
| @Override
protected void onActivityResult(int requestCode,int resultCode,Intent data){
super.onActivityResult(requestCode,resultCode,data);
String edit = data.getStringExtra("input");
tv.setText(edit);
}
|
在mainxml里面修改
1
2
3
4
5
6
| <TextView
android:id="@+id/tv"
android:layout_width="wrap_content"
android:layout_height="wrap_content"
android:text="Hello World!"
android:layout_centerInParent="true" />
|
现在我们想要实现的功能是在手机屏幕的左上角按一条一条来区分,目前的代码只能实现显示一条,而且是显示在屏幕中央,不过显示位置可以通过在mainxml里面修改来实现。
现在的主要逻辑是我们要不断的生成笔记并且输入笔记内容,然后我们需要按某种顺序把输入的笔记排列在屏幕上。
然后屏幕肯定会被填满,我们需要实现一个屏幕长度无线 可以下拉滚动的效果,并且曾经输入过的笔记必须是可以随时重新编辑和修改的。
为了实现上述的效果 我们就需要引入一个记事本功能的核心
ListView
相关的介绍可以自行百度,这里截一张图凑合一下
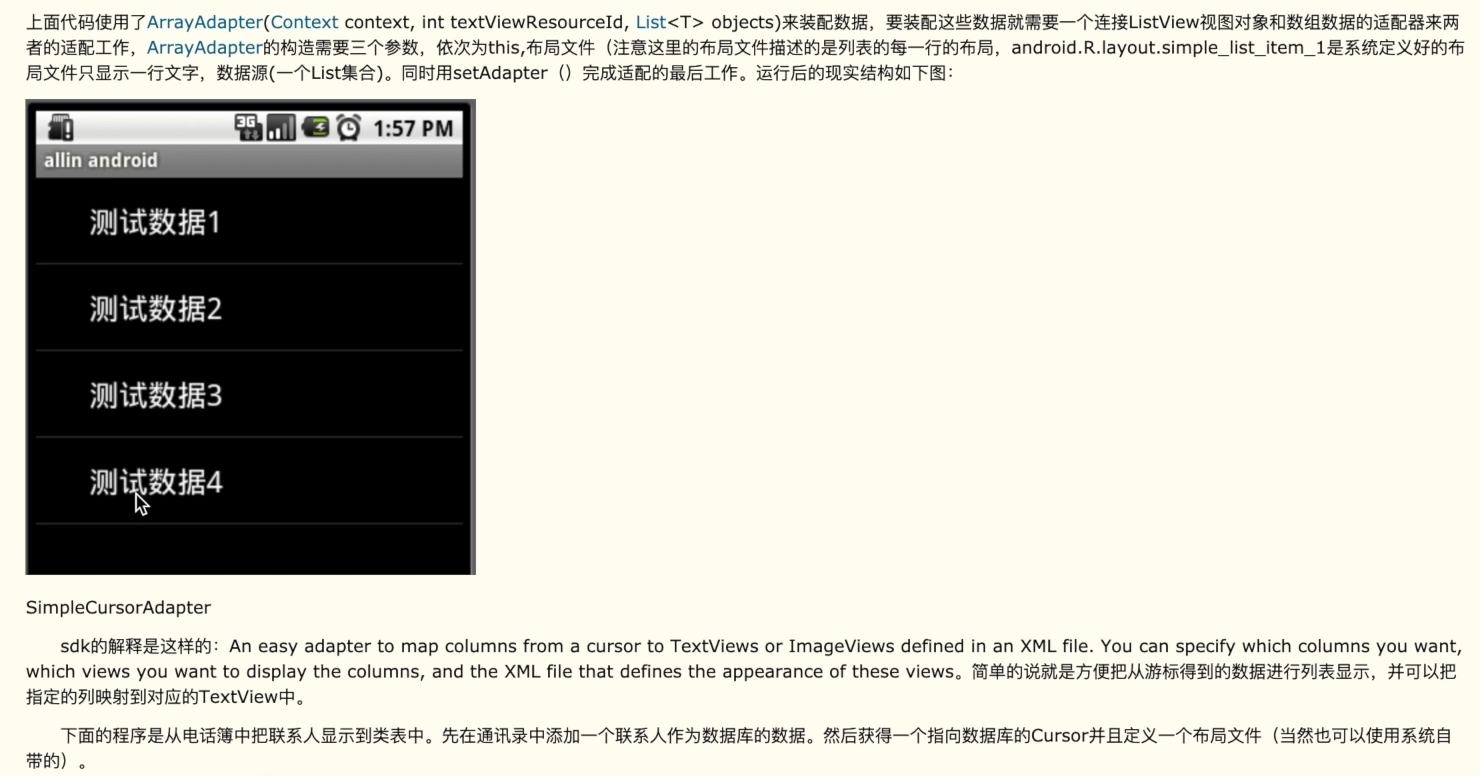
这张图就是非常只管的演示,这个lv的功能就是把你传入的信息一条一条排列(并且包括分割线)
总之通过这个就可以实现上面说的所有功能
然后他是如何实现的
列表的显示需要三个元素:
1、listview用来展示列表的view
2、适配器 用来吧数据映射到ListView上的中介
3、数据 具体的将被映射的字符串,图片,或者基本组件
所以我们现在首先要创建一个数据结构(一个类)
1
2
3
4
5
6
7
8
9
10
11
12
13
14
15
16
17
18
19
20
21
22
23
24
25
26
27
28
29
30
31
32
33
34
35
36
37
38
39
40
41
42
43
44
45
46
47
48
49
50
51
52
53
54
55
56
57
58
59
| package com.example.selfstudy001;
public class Note {
private long id;
private String content;
private String time;
private int tag;
public Note(){
}
public Note(String content, String time, int tag){
this.content = content;
this.time = time;
this.tag = tag;
}
public long getId() {
return id;
}
public void setId(long id) {
this.id = id;
}
public String getContent() {
return content;
}
public void setContent(String content) {
this.content = content;
}
public String getTime() {
return time;
}
public void setTime(String time) {
this.time = time;
}
public int getTag() {
return tag;
}
public void setTag(int tag) {
this.tag = tag;
}
@Override
public String toString() {
return content + "\n" + time.substring(5,16) + " " + id;
}
}
|
基本上的解析我都通过注释写在代码里了 所以现在也不赘述了。
接下来就到了我最讨厌的数据库环节了。
首先我们需要通过定义语句创建一个数据库(在这个安卓里面创建 不用连接mysql这些)
初始化数据库
NoteDatabase
1
2
3
4
5
6
7
8
9
10
11
12
13
14
15
16
17
18
19
20
21
22
23
24
25
26
27
28
29
30
31
32
33
34
35
36
37
38
39
40
41
42
43
44
45
46
47
48
49
| package com.example.selfstudy001;
import android.content.Context;
import android.database.sqlite.SQLiteDatabase;
import android.database.sqlite.SQLiteOpenHelper;
public class NoteDatabase extends SQLiteOpenHelper {
public static final String TABLE_NAME = "notes";
public static final String CONTENT = "content";
public static final String ID = "_id";
public static final String TIME = "time";
public static final String MODE = "mode";
public NoteDatabase(Context context){
super(context, TABLE_NAME, null, 1);
}
@Override
public void onCreate(SQLiteDatabase db) {
db.execSQL("CREATE TABLE " + TABLE_NAME
+ "("
+ ID + " INTEGER PRIMARY KEY AUTOINCREMENT,"
+ CONTENT + " TEXT NOT NULL,"
+ TIME + " TEXT NOT NULL,"
+ MODE + " INTEGER DEFAULT 1)"
);
}
@Override
public void onUpgrade(SQLiteDatabase db, int oldVersion, int newVersion) {
}
}
|
上面的代码主要是要负责管理数据库的创建和版本升级,这段代码说实话有很多细节其实不是很了解,都是去搜出来的,但是只要会用就算赢,老师问起来我直接放文档就行了应该。
简单来说onCreate 方法负责创建表,并定义了表的结构
onUpgrade 方法用于处理数据库版本升级时的操作
数据库操作
那么现在数据库初始化也有了,可以开始写数据库操作需要的代码了
CRUD.java
1
2
3
4
5
6
7
8
9
10
11
12
13
14
15
16
17
18
19
20
21
22
23
24
25
26
27
28
29
30
31
32
33
34
35
36
37
38
39
40
41
42
43
44
45
46
47
48
49
50
51
52
53
54
55
56
57
58
59
60
61
62
63
64
65
66
67
68
69
70
71
72
73
74
75
76
77
78
79
80
81
82
83
84
85
86
87
88
89
90
91
92
93
94
95
96
97
98
99
100
101
102
103
104
105
106
107
108
109
110
111
112
113
114
| package com.example.selfstudy001;
import android.content.ContentValues;
import android.content.Context;
import android.database.Cursor;
import android.database.sqlite.SQLiteDatabase;
import android.database.sqlite.SQLiteOpenHelper;
import java.util.ArrayList;
import java.util.List;
public class CRUD {
SQLiteOpenHelper dbHandler;
SQLiteDatabase db;
private static final String[] columns = {
NoteDatabase.ID,
NoteDatabase.CONTENT,
NoteDatabase.TIME,
NoteDatabase.MODE
};
public CRUD(Context context) {
dbHandler = new NoteDatabase(context);
}
public void open(){
db = dbHandler.getWritableDatabase();
}
public void close(){
dbHandler.close();
}
public Note addNote(Note note){
ContentValues contentValues = new ContentValues();
contentValues.put(NoteDatabase.CONTENT, note.getContent());
contentValues.put(NoteDatabase.TIME, note.getTime());
contentValues.put(NoteDatabase.MODE, note.getTag());
long insertId = db.insert(NoteDatabase.TABLE_NAME, null, contentValues);
note.setId(insertId);
return note;
}
public Note getNote(long id){
Cursor cursor = db.query(NoteDatabase.TABLE_NAME, columns, NoteDatabase.ID + "=?",
new String[] {String.valueOf(id)}, null, null, null, null);
if (cursor != null) cursor.moveToFirst();
Note e = new Note(cursor.getString(1), cursor.getString(2), cursor.getInt(3));
return e;
}
public List<Note> getAllNotes() {
Cursor cursor = db.query(NoteDatabase.TABLE_NAME, columns, null, null, null, null, null);
List<Note> notes = new ArrayList<>();
if (cursor.getCount() > 0) {
while (cursor.moveToNext()) {
Note note = new Note();
int idIndex = cursor.getColumnIndex(NoteDatabase.ID);
int contentIndex = cursor.getColumnIndex(NoteDatabase.CONTENT);
int timeIndex = cursor.getColumnIndex(NoteDatabase.TIME);
int modeIndex = cursor.getColumnIndex(NoteDatabase.MODE);
if (idIndex != -1) {note.setId(cursor.getLong(idIndex));}
if (contentIndex != -1) {note.setContent(cursor.getString(contentIndex));}
if (timeIndex != -1) {note.setTime(cursor.getString(timeIndex));}
if (modeIndex != -1) {note.setTag(cursor.getInt(modeIndex));}
notes.add(note);
}
}
return notes;
}
public int updateNote(Note note) {
ContentValues values = new ContentValues();
values.put(NoteDatabase.CONTENT, note.getContent());
values.put(NoteDatabase.TIME, note.getTime());
values.put(NoteDatabase.MODE, note.getTag());
return db.update(NoteDatabase.TABLE_NAME, values,
NoteDatabase.ID + "=?", new String[] { String.valueOf(note.getId())});
}
public void removeNote(Note note){
db.delete(NoteDatabase.TABLE_NAME, NoteDatabase.ID + "=" + note.getId(), null);
}
}
|
这里我们把数据库操作和初始化的语句也写好了,然后我们就可以开始写适配器了。
mainactivity
1
2
3
4
5
6
7
8
9
10
11
12
13
14
15
16
17
18
19
20
21
22
23
24
25
26
27
28
29
30
31
32
33
34
35
36
37
38
39
40
41
42
43
44
45
46
47
48
49
50
51
52
53
54
55
56
57
58
59
60
61
62
63
64
65
66
67
68
69
70
71
72
73
74
75
76
77
78
79
80
81
82
83
84
85
86
87
88
89
90
91
92
93
94
95
96
97
98
99
100
101
102
103
104
105
106
107
108
109
110
111
112
113
114
115
116
117
118
119
120
121
122
123
124
125
126
127
128
129
130
131
| package com.example.selfstudy001;
import android.content.Context;
import android.content.Intent;
import android.os.Bundle;
import android.util.Log;
import android.view.View;
import android.widget.ListView;
import android.widget.TextView;
import androidx.activity.EdgeToEdge;
import androidx.appcompat.app.AppCompatActivity;
import androidx.core.graphics.Insets;
import androidx.core.view.ViewCompat;
import androidx.core.view.WindowInsetsCompat;
import com.google.android.material.floatingactionbutton.FloatingActionButton;
import java.util.ArrayList;
import java.util.List;
public class MainActivity extends AppCompatActivity {
private NoteDatabase dbHelper;
final String TAG = "test";
FloatingActionButton btn1;
TextView tv;
private ListView lv;
private NoteAdapter adapter;
private List<Note> noteList = new ArrayList<Note>();
private Context context = this;
@Override
protected void onCreate(Bundle savedInstanceState) {
super.onCreate(savedInstanceState);
EdgeToEdge.enable(this);
setContentView(R.layout.activity_main);
ViewCompat.setOnApplyWindowInsetsListener(findViewById(R.id.main), (v, insets) -> {
Insets systemBars = insets.getInsets(WindowInsetsCompat.Type.systemBars());
v.setPadding(systemBars.left, systemBars.top, systemBars.right, systemBars.bottom);
btn1 = (FloatingActionButton)findViewById(R.id.fab);
tv = findViewById(R.id.tv);
lv = findViewById(R.id.lv);
adapter = new NoteAdapter(getApplicationContext(), noteList);
refreshListView();
lv.setAdapter(adapter);
btn1.setOnClickListener(new View.OnClickListener() {
@Override
public void onClick(View v) {
Intent intent = new Intent(MainActivity.this, EditActivity.class);
startActivityForResult(intent,0);
}
});
return insets;
});
}
@Override
protected void onActivityResult(int requestCode,int resultCode,Intent data){
super.onActivityResult(requestCode,resultCode,data);
String content = data.getStringExtra("content");
String time = data.getStringExtra("time");
Note note = new Note(content,time,1);
CRUD op = new CRUD(context);
op.open();
op.addNote(note);
op.close();
}
public void refreshListView(){
CRUD op = new CRUD(context);
op.open();
if (noteList.size() > 0) noteList.clear();
noteList.addAll(op.getAllNotes());
op.close();
adapter.notifyDataSetChanged();
}
}
|
总体代码
CRUD
1
2
3
4
5
6
7
8
9
10
11
12
13
14
15
16
17
18
19
20
21
22
23
24
25
26
27
28
29
30
31
32
33
34
35
36
37
38
39
40
41
42
43
44
45
46
47
48
49
50
51
52
53
54
55
56
57
58
59
60
61
62
63
64
65
66
67
68
69
70
71
72
73
74
75
76
77
78
79
80
81
82
83
84
85
86
87
88
89
90
91
92
93
94
95
96
97
98
99
100
101
102
103
104
105
106
107
108
109
110
111
112
113
114
| package com.example.selfstudy001;
import android.content.ContentValues;
import android.content.Context;
import android.database.Cursor;
import android.database.sqlite.SQLiteDatabase;
import android.database.sqlite.SQLiteOpenHelper;
import java.util.ArrayList;
import java.util.List;
public class CRUD {
SQLiteOpenHelper dbHandler;
SQLiteDatabase db;
private static final String[] columns = {
NoteDatabase.ID,
NoteDatabase.CONTENT,
NoteDatabase.TIME,
NoteDatabase.MODE
};
public CRUD(Context context) {
dbHandler = new NoteDatabase(context);
}
public void open(){
db = dbHandler.getWritableDatabase();
}
public void close(){
dbHandler.close();
}
public Note addNote(Note note){
ContentValues contentValues = new ContentValues();
contentValues.put(NoteDatabase.CONTENT, note.getContent());
contentValues.put(NoteDatabase.TIME, note.getTime());
contentValues.put(NoteDatabase.MODE, note.getTag());
long insertId = db.insert(NoteDatabase.TABLE_NAME, null, contentValues);
note.setId(insertId);
return note;
}
public Note getNote(long id){
Cursor cursor = db.query(NoteDatabase.TABLE_NAME, columns, NoteDatabase.ID + "=?",
new String[] {String.valueOf(id)}, null, null, null, null);
if (cursor != null) cursor.moveToFirst();
Note e = new Note(cursor.getString(1), cursor.getString(2), cursor.getInt(3));
return e;
}
public List<Note> getAllNotes() {
Cursor cursor = db.query(NoteDatabase.TABLE_NAME, columns, null, null, null, null, null);
List<Note> notes = new ArrayList<>();
if (cursor.getCount() > 0) {
while (cursor.moveToNext()) {
Note note = new Note();
int idIndex = cursor.getColumnIndex(NoteDatabase.ID);
int contentIndex = cursor.getColumnIndex(NoteDatabase.CONTENT);
int timeIndex = cursor.getColumnIndex(NoteDatabase.TIME);
int modeIndex = cursor.getColumnIndex(NoteDatabase.MODE);
if (idIndex != -1) {note.setId(cursor.getLong(idIndex));}
if (contentIndex != -1) {note.setContent(cursor.getString(contentIndex));}
if (timeIndex != -1) {note.setTime(cursor.getString(timeIndex));}
if (modeIndex != -1) {note.setTag(cursor.getInt(modeIndex));}
notes.add(note);
}
}
return notes;
}
public int updateNote(Note note) {
ContentValues values = new ContentValues();
values.put(NoteDatabase.CONTENT, note.getContent());
values.put(NoteDatabase.TIME, note.getTime());
values.put(NoteDatabase.MODE, note.getTag());
return db.update(NoteDatabase.TABLE_NAME, values,
NoteDatabase.ID + "=?", new String[] { String.valueOf(note.getId())});
}
public void removeNote(Note note){
db.delete(NoteDatabase.TABLE_NAME, NoteDatabase.ID + "=" + note.getId(), null);
}
}
|
EditActivity
1
2
3
4
5
6
7
8
9
10
11
12
13
14
15
16
17
18
19
20
21
22
23
24
25
26
27
28
29
30
31
32
33
34
35
36
37
38
39
40
41
42
43
44
45
46
47
48
49
50
51
52
53
54
55
56
57
58
59
60
61
62
63
64
65
66
67
68
| package com.example.selfstudy001;
import android.content.Intent;
import android.os.Bundle;
import android.view.KeyEvent;
import android.widget.EditText;
import androidx.annotation.Nullable;
import androidx.appcompat.app.AppCompatActivity;
import com.google.android.material.floatingactionbutton.FloatingActionButton;
import java.text.SimpleDateFormat;
import java.util.Date;
public class EditActivity extends AppCompatActivity {
EditText et;
private String content;
private String time;
@Override
protected void onCreate(@Nullable Bundle savedInstanceState) {
super.onCreate(savedInstanceState);
setContentView(R.layout.edit_layout);
et = findViewById(R.id.et);
}
public boolean onKeyDown(int keyCode,KeyEvent event){
if(keyCode == KeyEvent.KEYCODE_HOME){
return true;
}
else if (keyCode == KeyEvent.KEYCODE_BACK)
{
Intent intent = new Intent();
intent.putExtra("content",et.getText().toString());
intent.putExtra("time", dateToStr());
setResult(RESULT_OK,intent);
finish();
return true;
}
return super.onKeyDown(keyCode,event);
}
public String dateToStr(){
Date date = new Date();
SimpleDateFormat simpleDateFormat = new SimpleDateFormat("yyyy-MM-dd HH:mm:ss");
return simpleDateFormat.format(date);
}
}
|
MainActivity
1
2
3
4
5
6
7
8
9
10
11
12
13
14
15
16
17
18
19
20
21
22
23
24
25
26
27
28
29
30
31
32
33
34
35
36
37
38
39
40
41
42
43
44
45
46
47
48
49
50
51
52
53
54
55
56
57
58
59
60
61
62
63
64
65
66
67
68
69
70
71
72
73
74
75
76
77
78
79
80
81
82
83
84
85
86
87
88
89
90
91
92
93
94
95
96
97
98
99
100
101
102
103
104
105
106
107
108
109
110
111
112
113
114
115
116
117
118
119
120
121
| package com.example.selfstudy001;
import android.content.Context;
import android.content.Intent;
import android.os.Bundle;
import android.view.View;
import android.widget.ListView;
import android.widget.TextView;
import androidx.activity.result.ActivityResultLauncher;
import androidx.activity.result.contract.ActivityResultContracts;
import androidx.activity.EdgeToEdge;
import androidx.appcompat.app.AppCompatActivity;
import androidx.core.graphics.Insets;
import androidx.core.view.ViewCompat;
import androidx.core.view.WindowInsetsCompat;
import com.google.android.material.floatingactionbutton.FloatingActionButton;
import java.util.ArrayList;
import java.util.List;
public class MainActivity extends AppCompatActivity {
private NoteDatabase dbHelper;
final String TAG = "test";
FloatingActionButton btn1;
TextView tv;
private ListView lv;
private NoteAdapter adapter;
private List<Note> noteList = new ArrayList<Note>();
private Context context = this;
ActivityResultLauncher<Intent> startActivityForResultLauncher;
@Override
protected void onCreate(Bundle savedInstanceState) {
super.onCreate(savedInstanceState);
EdgeToEdge.enable(this);
setContentView(R.layout.activity_main);
startActivityForResultLauncher = registerForActivityResult(
new ActivityResultContracts.StartActivityForResult(),
result -> {
if (result.getResultCode() == RESULT_OK && result.getData() != null) {
String content = result.getData().getStringExtra("content");
String time = result.getData().getStringExtra("time");
Note note = new Note(content, time, 1);
CRUD op = new CRUD(context);
op.open();
op.addNote(note);
op.close();
refreshListView();
}
});
ViewCompat.setOnApplyWindowInsetsListener(findViewById(R.id.main), (v, insets) -> {
Insets systemBars = insets.getInsets(WindowInsetsCompat.Type.systemBars());
v.setPadding(systemBars.left, systemBars.top, systemBars.right, systemBars.bottom);
btn1 = (FloatingActionButton)findViewById(R.id.fab);
tv = findViewById(R.id.tv);
lv = findViewById(R.id.lv);
adapter = new NoteAdapter(getApplicationContext(), noteList);
refreshListView();
lv.setAdapter(adapter);
btn1.setOnClickListener(new View.OnClickListener() {
@Override
public void onClick(View v) {
Intent intent = new Intent(MainActivity.this, EditActivity.class);
startActivityForResultLauncher.launch(intent);
}
});
return insets;
});
}
public void refreshListView(){
CRUD op = new CRUD(context);
op.open();
if (noteList.size() > 0) noteList.clear();
noteList.addAll(op.getAllNotes());
op.close();
adapter.notifyDataSetChanged();
}
}
|
Note
1
2
3
4
5
6
7
8
9
10
11
12
13
14
15
16
17
18
19
20
21
22
23
24
25
26
27
28
29
30
31
32
33
34
35
36
37
38
39
40
41
42
43
44
45
46
47
48
49
50
51
52
53
54
55
56
57
58
59
| package com.example.selfstudy001;
public class Note {
private long id;
private String content;
private String time;
private int tag;
public Note(){
}
public Note(String content, String time, int tag){
this.content = content;
this.time = time;
this.tag = tag;
}
public long getId() {
return id;
}
public void setId(long id) {
this.id = id;
}
public String getContent() {
return content;
}
public void setContent(String content) {
this.content = content;
}
public String getTime() {
return time;
}
public void setTime(String time) {
this.time = time;
}
public int getTag() {
return tag;
}
public void setTag(int tag) {
this.tag = tag;
}
@Override
public String toString() {
return content + "\n" + time.substring(5,16) + " " + id;
}
}
|
NoteAdapter
1
2
3
4
5
6
7
8
9
10
11
12
13
14
15
16
17
18
19
20
21
22
23
24
25
26
27
28
29
30
31
32
33
34
35
36
37
38
39
40
41
42
43
44
45
46
47
48
49
50
51
52
53
54
55
56
57
58
59
60
61
62
63
64
65
66
67
68
69
70
71
72
73
74
75
76
77
78
79
80
81
82
83
84
85
86
87
88
89
90
91
92
93
94
95
96
97
98
99
100
101
102
103
104
105
106
107
108
109
110
111
112
113
114
115
116
| package com.example.selfstudy001;
import android.content.Context;
import android.text.TextUtils;
import android.view.View;
import android.view.ViewGroup;
import android.widget.BaseAdapter;
import android.widget.Filter;
import android.widget.Filterable;
import android.widget.TextView;
import java.util.ArrayList;
import java.util.List;
public class NoteAdapter extends BaseAdapter implements Filterable {
private Context mContext;
private List<Note> backList;
private List<Note> noteList;
private MyFilter mFilter;
public NoteAdapter(Context mContext, List<Note> noteList) {
this.mContext = mContext;
this.noteList = noteList;
this.backList = new ArrayList<>(noteList);
}
class MyFilter extends Filter {
@Override
protected FilterResults performFiltering(CharSequence charSequence) {
FilterResults result = new FilterResults();
List<Note> list;
if (TextUtils.isEmpty(charSequence)) {
list = backList;
} else {
list = new ArrayList<>();
for (Note note : backList) {
if (note.getContent().contains(charSequence)) {
list.add(note);
}
}
}
result.values = list;
result.count = list.size();
return result;
}
@Override
protected void publishResults(CharSequence charSequence, FilterResults filterResults) {
noteList = (List<Note>) filterResults.values;
if (filterResults.count > 0) {
notifyDataSetChanged();
} else {
notifyDataSetInvalidated();
}
}
}
@Override
public int getCount() {
return noteList.size();
}
@Override
public Object getItem(int position) {
return noteList.get(position);
}
@Override
public long getItemId(int position) {
return position;
}
@Override
public View getView(int position, View convertView, ViewGroup parent) {
View v = View.inflate(mContext, R.layout.note_layout, null);
TextView tv_content = v.findViewById(R.id.tv_content);
TextView tv_time = v.findViewById(R.id.tv_time);
String allText = noteList.get(position).getContent();
tv_content.setText(allText);
tv_time.setText(noteList.get(position).getTime());
v.setTag(noteList.get(position).getId());
return v;
}
@Override
public Filter getFilter() {
if (mFilter ==null){
mFilter = new MyFilter();
}
return mFilter;
}
}
|
NoteDatabase
1
2
3
4
5
6
7
8
9
10
11
12
13
14
15
16
17
18
19
20
21
22
23
24
25
26
27
28
29
30
31
32
33
34
35
36
37
38
39
40
41
42
43
44
45
46
47
| package com.example.selfstudy001;
import android.content.Context;
import android.database.sqlite.SQLiteDatabase;
import android.database.sqlite.SQLiteOpenHelper;
public class NoteDatabase extends SQLiteOpenHelper {
public static final String TABLE_NAME = "notes";
public static final String CONTENT = "content";
public static final String ID = "_id";
public static final String TIME = "time";
public static final String MODE = "mode";
public NoteDatabase(Context context){
super(context, TABLE_NAME, null, 1);
}
@Override
public void onCreate(SQLiteDatabase db) {
db.execSQL("CREATE TABLE " + TABLE_NAME
+ "("
+ ID + " INTEGER PRIMARY KEY AUTOINCREMENT,"
+ CONTENT + " TEXT NOT NULL,"
+ TIME + " TEXT NOT NULL,"
+ MODE + " INTEGER DEFAULT 1)"
);
}
@Override
public void onUpgrade(SQLiteDatabase db, int oldVersion, int newVersion) {
}
}
|
layout部分
activity_main.xml
1
2
3
4
5
6
7
8
9
10
11
12
13
14
15
16
17
18
19
20
21
22
23
24
25
26
27
28
29
30
31
32
33
34
35
36
37
38
39
40
41
42
43
44
45
46
47
48
49
50
51
| <?xml version="1.0" encoding="utf-8"?>
<RelativeLayout xmlns:android="http://schemas.android.com/apk/res/android"
xmlns:app="http://schemas.android.com/apk/res-auto"
xmlns:tools="http://schemas.android.com/tools"
android:id="@+id/main"
android:layout_width="match_parent"
android:layout_height="match_parent"
tools:context=".MainActivity">
<TextView
android:id="@+id/tv"
android:layout_width="wrap_content"
android:layout_height="wrap_content"
android:text="Hello World!"
android:layout_centerInParent="true" >
</TextView>
<ListView
android:id="@+id/lv"
android:layout_width="match_parent"
android:layout_height="match_parent"
android:layout_marginLeft="10dp"
android:layout_marginRight="10dp"
android:layout_marginTop="8dp"
android:divider="@android:color/darker_gray"
android:dividerHeight="8dp"
>
</ListView>
<com.google.android.material.floatingactionbutton.FloatingActionButton
android:id="@+id/fab"
android:layout_width="wrap_content"
android:layout_height="wrap_content"
android:layout_alignParentEnd="true"
android:layout_alignParentBottom="true"
android:layout_margin="16dp"
android:layout_marginStart="16dp"
android:layout_marginTop="16dp"
android:layout_marginEnd="9dp"
android:layout_marginBottom="43dp"
android:clickable="true"
android:contentDescription="@string/fab_description"
tools:srcCompat="@drawable/baseline_add_24" />
</RelativeLayout>
|
edit_layout.xml
1
2
3
4
5
6
7
8
9
10
11
12
13
14
15
16
17
| <?xml version="1.0" encoding="utf-8"?>
<LinearLayout xmlns:android="http://schemas.android.com/apk/res/android"
android:layout_width="match_parent"
android:layout_height="match_parent"
android:orientation="vertical">
<EditText
android:id="@+id/et"
android:layout_width="match_parent"
android:layout_height="match_parent"
android:gravity="top">
</EditText>
</LinearLayout>
|
new_layout
1
2
3
4
5
6
7
8
| <?xml version="1.0" encoding="utf-8"?>
<LinearLayout xmlns:android="http://schemas.android.com/apk/res/android"
android:orientation="vertical"
android:layout_width="match_parent"
android:layout_height="match_parent">
</LinearLayout>
|
note_layout.xml
1
2
3
4
5
6
7
8
9
10
11
12
13
14
15
16
17
18
19
20
21
22
23
24
25
26
27
28
29
| <?xml version="1.0" encoding="utf-8"?>
<LinearLayout xmlns:android="http://schemas.android.com/apk/res/android"
android:orientation="vertical" android:layout_width="match_parent"
android:layout_height="match_parent"
android:paddingLeft="10dp"
android:paddingRight="10dp"
android:paddingTop="5dp"
android:paddingBottom="12dp"
android:background="@drawable/note_shape"
android:outlineAmbientShadowColor="@color/black">
<TextView
android:id="@+id/tv_content"
android:layout_width="wrap_content"
android:layout_height="wrap_content"
android:text="Content"
android:textSize="20dp"
android:textColor="@color/tv_main_color"
android:singleLine="true"/>
<TextView
android:id="@+id/tv_time"
android:layout_width="wrap_content"
android:layout_height="wrap_content"
android:text="Time"
android:textSize="16dp"
android:textColor="@color/greyC"/>
</LinearLayout>
|
自定义活动栏和笔记可点击
首先在mainactivity里面加入工具栏
1
2
3
4
5
6
7
8
9
10
|
<androidx.appcompat.widget.Toolbar
android:id="@+id/myToolbar"
android:layout_width="match_parent"
android:layout_height="?attr/actionBarSize"
android:background="?attr/colorPrimary"
android:elevation="4dp"
app:titleTextColor="?attr/titleColor"
android:theme="?attr/toolbarTheme"
app:popupTheme="@style/ThemeOverlay.AppCompat.Light">
|
然后在mainactivity里面加入代码
1
2
3
4
5
6
7
8
9
10
| private Toolbar myToolbar;
myToolbar = findViewById(R.id.myToolbar);
setSupportActionBar(myToolbar);
getSupportActionBar().setHomeButtonEnabled(true);
getSupportActionBar().setDisplayHomeAsUpEnabled(true);
initPopUpView();
myToolbar.setNavigationIcon(R.drawable.ic_menu_black_24dp);
myToolbar.setNavigationOnClickListener(new View.OnClickListener() {
|
这样改完之后工具栏就会出现在主页面,然后笔记的位置也会下移。(要加个css below样式)
在mainactivity中加入以下内容,
实现可实现点击已创建过的笔记
1
2
3
4
5
6
7
8
9
10
11
12
13
14
15
16
17
|
if (openMode == 3) {
id = getIntent.getLongExtra("id", 0);
old_content = getIntent.getStringExtra("content");
old_time = getIntent.getStringExtra("time");
old_Tag = getIntent.getIntExtra("tag", 1);
et.setText(old_content);
et.setSelection(old_content.length());
}
}
intent.putExtra("mode", 4);
|
在editactivity设置
1
2
3
4
5
6
7
8
9
10
11
12
13
14
15
16
17
18
19
20
21
22
23
24
25
26
27
| public Intent intent = new Intent();
autoSetMessage();
public void autoSetMessage(){
if(openMode == 4){
if(et.getText().toString().length() == 0){
intent.putExtra("mode", -1);
}
else{
intent.putExtra("mode", 0);
intent.putExtra("content", et.getText().toString());
intent.putExtra("time", dateToStr());
intent.putExtra("tag", tag);
}
}
else {
if (et.getText().toString().equals(old_content) && !tagChange)
intent.putExtra("mode", -1);
else {
intent.putExtra("mode", 1);
intent.putExtra("content", et.getText().toString());
intent.putExtra("time", dateToStr());
intent.putExtra("id", id);
intent.putExtra("tag", tag);
}
}
}
|
总结就是先在页面里面加入了活动栏的布局,在前端方面就有了活动栏。
然后再mainactivicy里面加入活动栏初始化的代码。
然后编写function,添加点击事件,给list里面的每一条笔记添加一个点击事件,点击笔记的时候新建一个页面,并且读取之前的笔记内容,然后生成,然后监听对原本的笔记内容是否有改变,有的话就用新的笔记页面取代旧的。
简单来说就是这样 然后还引入了mode设置 不同mode不一样。
菜单栏
首先前面已经添加了 活动栏,但是活动栏上面还没有元素
标签需要在活动栏中修改,所以我们先搞定活动蓝(菜单栏)是完成后续标签功能的前置条件
对于每一个活动栏需要添加的功能都需要在res文件夹下面新建一个menu类的资源文件夹
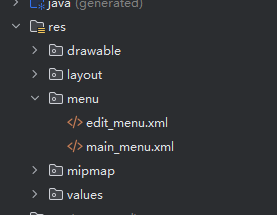
然后在里面创建菜单文件
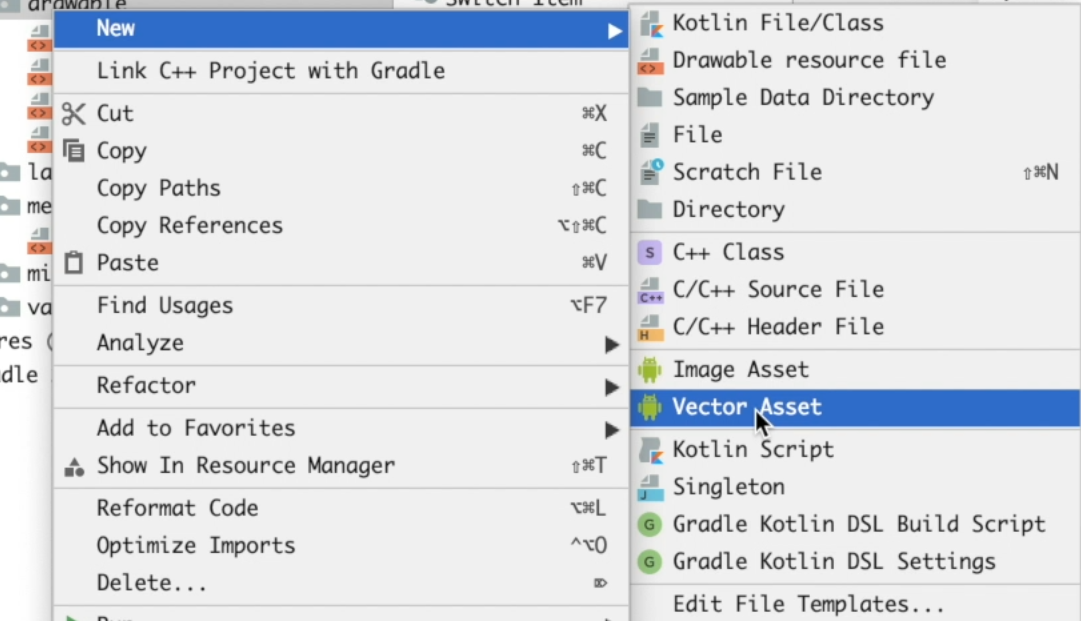
接着在drawable里面创建图标文件
然后在menu的xml文件里面引入图标
mainmenu.xml
1
2
3
4
5
6
7
8
9
10
11
12
13
14
15
16
17
| <?xml version="1.0" encoding="utf-8"?>
<menu xmlns:android="http://schemas.android.com/apk/res/android"
xmlns:app="http://schemas.android.com/apk/res-auto">
<item
android:id="@+id/action_search"
android:icon="?attr/menu_search"
app:showAsAction="always"
app:actionViewClass="androidx.appcompat.widget.SearchView"
android:title="Search"
/>
<item
android:id="@+id/menu_clear"
android:icon="?attr/menu_delete_all"
android:title="Clear"
app:showAsAction="always"
/>
</menu>
|
1
2
3
4
5
6
7
8
9
10
| <?xml version="1.0" encoding="utf-8"?>
<menu xmlns:android="http://schemas.android.com/apk/res/android"
xmlns:app="http://schemas.android.com/apk/res-auto">
<item
android:id="@+id/delete"
android:icon="?attr/menu_delete"
android:title="Delete"
app:showAsAction="always"
/>
</menu>
|
引入的图标默认靠右,如果要设置位置的话就要设置一些属性往中间靠。
修改mainactivity.java
1
2
3
4
5
6
7
8
9
|
myToolbar.setNavigationIcon(R.drawable.ic_menu_black_24dp);
myToolbar.setNavigationOnClickListener(new View.OnClickListener() {
@Override
public void onClick(View v) {
Log.d(TAG, "onClick: shit");
showPopUpView();
}
});
|
editactivity.java
1
2
3
4
5
6
7
8
9
10
11
12
13
14
15
16
17
18
19
20
21
22
23
24
25
26
27
28
29
30
31
|
@Override
public boolean onCreateOptionsMenu(Menu menu) {
getMenuInflater().inflate(R.menu.edit_menu, menu);
return super.onCreateOptionsMenu(menu);
}
@Override
protected void onCreate(Bundle savedInstanceState) {
super.onCreate(savedInstanceState);
setContentView(R.layout.edit_layout);
myToolbar = findViewById(R.id.my_Toolbar);
setSupportActionBar(myToolbar);
getSupportActionBar().setHomeButtonEnabled(true);
getSupportActionBar().setDisplayHomeAsUpEnabled(true);
myToolbar.setNavigationOnClickListener(new View.OnClickListener() {
@Override
public void onClick(View v) {
autoSetMessage();
setResult(RESULT_OK, intent);
finish();
}
});
et = findViewById(R.id.et);
Intent getIntent = getIntent();
openMode = getIntent.getIntExtra("mode", 0);
|
删除功能的实现
上一部分加入了状态栏的图标,但是具体的功能还没有实现,这一章节过来实现一下
先从编辑页面开始,因为编辑页面的删除功能只需要删除当前页面,会比较简单。
editactivity
1
2
3
4
5
6
7
8
9
10
11
12
13
14
15
16
17
18
19
20
21
22
23
24
25
26
27
28
29
30
31
32
33
34
35
36
37
38
39
40
41
42
43
44
45
|
@Override
public boolean onOptionsItemSelected(@NonNull MenuItem item) {
switch (item.getItemId()){
case R.id.delete:
new AlertDialog.Builder(EditActivity.this)
.setMessage("删除吗?")
.setPositiveButton(android.R.string.yes, new DialogInterface.OnClickListener() {
@Override
public void onClick(DialogInterface dialog, int which) {
if (openMode == 4){
intent.putExtra("mode", -1);
setResult(RESULT_OK, intent);
}
else {
intent.putExtra("mode", 2);
intent.putExtra("id", id);
setResult(RESULT_OK, intent);
}
finish();
}
}).setNegativeButton(android.R.string.no, new DialogInterface.OnClickListener() {
@Override
public void onClick(DialogInterface dialog, int which) {
dialog.dismiss();
}
}).create().show();
break;
}
return super.onOptionsItemSelected(item);
}
|
mainactivity
1
2
3
4
5
6
7
8
9
10
11
12
13
14
15
16
17
18
19
20
21
22
23
24
25
26
| @Override
public boolean onOptionsItemSelected(@NonNull MenuItem item) {
switch (item.getItemId()){
case R.id.menu_clear:
new AlertDialog.Builder(MainActivity.this)
.setMessage("删除全部吗?")
.setPositiveButton(android.R.string.yes, new DialogInterface.OnClickListener() {
@Override
public void onClick(DialogInterface dialog, int which) {
dbHelper = new NoteDatabase(context);
SQLiteDatabase db = dbHelper.getWritableDatabase();
db.delete("notes", null, null);
db.execSQL("update sqlite_sequence set seq=0 where name='notes'");
refreshListView();
}
}).setNegativeButton(android.R.string.no, new DialogInterface.OnClickListener() {
@Override
public void onClick(DialogInterface dialog, int which) {
dialog.dismiss();
}
}).create().show();
break;
}
return super.onOptionsItemSelected(item);
}
|
笔记的主要功能其实到这里已经结束了,因为增删改都已经实现了。
接下来就是对其他功能的优化迭代了。还有实现查找功能。
搜索笔记
有什么用?
一方面增删改查就差个查找了
另一方面编辑很多的时候确实有用。
main_menu.xml
1
2
3
4
5
6
7
8
9
10
11
12
13
14
15
16
17
18
19
| <?xml version="1.0" encoding="utf-8"?>
<menu xmlns:android="http://schemas.android.com/apk/res/android"
xmlns:app="http://schemas.android.com/apk/res-auto">
<item
android:id="@+id/action_search"
android:icon="?attr/menu_search"
app:showAsAction="always"
app:actionViewClass="androidx.appcompat.widget.SearchView"
android:title="Search"
/>
<item
android:id="@+id/menu_clear"
android:icon="?attr/menu_delete_all"
android:title="Clear"
app:showAsAction="always"
/>
</menu>
|
mainacticity
1
2
3
4
5
6
7
8
9
10
11
12
13
14
15
16
17
18
19
20
21
22
23
24
25
26
27
28
29
30
31
32
|
@Override
public boolean onCreateOptionsMenu(Menu menu) {
getMenuInflater().inflate(R.menu.main_menu, menu);
MenuItem mSearch = menu.findItem(R.id.action_search);
SearchView mSearchView = (SearchView) mSearch.getActionView();
mSearchView.setQueryHint("Search");
mSearchView.setOnQueryTextListener(new SearchView.OnQueryTextListener() {
@Override
public boolean onQueryTextSubmit(String query) {
return false;
}
@Override
public boolean onQueryTextChange(String newText) {
adapter.getFilter().filter(newText);
return false;
}
});
return super.onCreateOptionsMenu(menu);
}
|
因为这个代码具体的实现在适配器里面已经写了过滤器了,所以直接把按钮装上之后把方法调用过来就行,所以写起来特别方便。
弹出菜单
想要实现功能,首先必须要有这个页面,所以我们先加一个设置菜单。
setting_layout
1
2
3
4
5
6
7
8
9
10
11
12
13
14
15
16
17
18
19
20
21
22
23
24
25
26
27
28
29
30
31
32
33
34
35
36
37
38
39
40
41
42
43
44
45
46
47
48
49
50
51
52
53
54
55
56
57
58
59
60
61
| <?xml version="1.0" encoding="utf-8"?>
<LinearLayout xmlns:android="http://schemas.android.com/apk/res/android"
xmlns:app="http://schemas.android.com/apk/res-auto"
android:orientation="vertical"
android:layout_width="match_parent"
android:layout_height="match_parent">
<androidx.appcompat.widget.Toolbar
android:layout_width="match_parent"
android:layout_height="?attr/actionBarSize"
android:background="?attr/colorPrimary"
android:elevation="4dp"
android:theme="@style/ThemeOverlay.AppCompat.ActionBar"
app:popupTheme="@style/ThemeOverlay.AppCompat.Light"
app:title="弹出菜单"
app:titleTextColor="?attr/titleColor"
/>
<LinearLayout
android:layout_width="match_parent"
android:layout_height="wrap_content"
android:focusable="true"
android:focusableInTouchMode="true"
android:clickable="true"
android:orientation="vertical">
<LinearLayout
android:layout_width="match_parent"
android:layout_height="48dp"
android:orientation="horizontal"
>
<ImageView
android:id="@+id/setting_settings_image"
android:layout_width="wrap_content"
android:layout_height="wrap_content"
android:layout_margin="10dp"
android:src="?attr/settingIcon"
android:layout_gravity="center"
/>
<TextView
android:id="@+id/setting_settings_text"
android:layout_width="wrap_content"
android:layout_height="wrap_content"
android:text="设置"
android:textColor="?attr/tvMainColor"
android:layout_marginLeft="10dp"
android:layout_weight="1"
android:layout_gravity="center"
android:textSize="24dp"/>
</LinearLayout>
<ImageView
android:layout_width="match_parent"
android:layout_height="1dp"
android:background="@color/black"
android:alpha="0.2"/>
<ListView
android:id="@+id/lv_tag"
android:layout_width="match_parent"
android:layout_height="wrap_content">
</ListView>
</LinearLayout>
</LinearLayout>
|
再引入设置图标
mainactivity
1
2
3
4
5
6
7
8
9
10
11
12
13
14
15
16
17
18
19
20
21
22
23
24
25
26
27
28
29
30
31
32
33
34
35
36
37
38
39
40
41
42
43
44
45
46
47
48
49
50
51
52
53
54
55
56
57
58
59
60
61
62
63
64
65
66
67
68
69
70
|
private PopupWindow popupWindow;
private PopupWindow popupCover;
private ViewGroup customView;
private ViewGroup coverView;
initPopUpView();
public void initPopUpView(){
layoutInfater = (LayoutInflater)MainActivity.this.getSystemService(Context.LAYOUT_INFLATER_SERVICE);
customView = (ViewGroup) layoutInfater.inflate(R.layout.setting_layout, null);
coverView = (ViewGroup) layoutInfater.inflate(R.layout.setting_cover, null);
main = findViewById(R.id.main_layout);
wm = getWindowManager();
metrics = new DisplayMetrics();
wm.getDefaultDisplay().getMetrics(metrics);
}
public void showPopUpView(){
int width = metrics.widthPixels;
int height = metrics.heightPixels;
popupCover = new PopupWindow(coverView, width, height, false);
popupWindow = new PopupWindow(customView, (int)(width*0.7), height, true);
popupWindow.setBackgroundDrawable(new ColorDrawable(Color.WHITE));
findViewById(R.id.main_layout).post(new Runnable() {
@Override
public void run() {
popupCover.showAtLocation(main, Gravity.NO_GRAVITY, 0, 0);
popupWindow.showAtLocation(main, Gravity.NO_GRAVITY, 0, 0);
setting_image = customView.findViewById(R.id.setting_settings_image);
setting_text = customView.findViewById(R.id.setting_settings_text);
setting_image.setOnClickListener(new View.OnClickListener() {
@Override
public void onClick(View v) {
startActivity(new Intent(MainActivity.this, UserSettingsActivity.class));
}
});
setting_text.setOnClickListener(new View.OnClickListener() {
@Override
public void onClick(View v) {
startActivity(new Intent(MainActivity.this, UserSettingsActivity.class));
}
});
coverView.setOnTouchListener(new View.OnTouchListener() {
@Override
public boolean onTouch(View v, MotionEvent event) {
popupWindow.dismiss();
return true;
}
});
popupWindow.setOnDismissListener(new PopupWindow.OnDismissListener() {
@Override
public void onDismiss() {
popupCover.dismiss();
Log.d(TAG, "onDismiss: test");
}
});
}
});
}
|
这里想实现的一个效果是弹出窗口,然后弹出窗口加载之后要让背景变暗,然后弹出窗口保持原本的亮度。
但是查阅了文档和我上网搜了之后没有发现任何一个方法可以实现这个效果,所以选择曲线救国。在上面再铺设一层透明的层。
setting_cover.xml
1
2
3
4
5
6
7
8
9
10
11
12
| <?xml version="1.0" encoding="utf-8"?>
<LinearLayout xmlns:android="http://schemas.android.com/apk/res/android"
android:orientation="vertical" android:layout_width="match_parent"
android:layout_height="match_parent">
<View
android:layout_width="match_parent"
android:layout_height="match_parent"
android:background="@color/cover">
</View>
</LinearLayout>
|
黑夜模式
首先黑夜模式需要在设置里面切换,那么我们首先要写一个基础的BaseActivity
作用主要是减少重复的代码,只有用通用的功能 也是写在baseActiviy里面 类似上学期的java
BaseActivity
1
2
3
4
5
6
7
8
9
10
11
12
13
14
15
16
17
18
19
20
21
22
23
24
| package com.example.biji;
import androidx.appcompat.app.AppCompatActivity;
import android.content.SharedPreferences;
import android.os.Bundle;
import android.preference.PreferenceManager;
public class BaseActivity extends AppCompatActivity {
@Override
protected void onCreate(Bundle savedInstanceState){
super.onCreate(savedInstanceState);
setNightMode();
}
public boolean isNightMode(){
SharedPreferences sharedPreferences = PreferenceManager.getDefaultSharedPreferences(getBaseContext());
return sharedPreferences.getBoolean("nightMode", false);
}
public void setNightMode(){
setTheme(R.style.DayTheme);
}
}
|
UserSettingActivity
1
2
3
4
5
6
7
8
9
10
11
12
13
14
15
16
17
18
19
20
21
22
23
24
25
26
27
28
29
30
31
32
33
34
35
36
37
38
39
40
41
42
43
44
45
46
47
48
49
50
51
52
53
54
55
56
57
58
59
60
61
62
63
64
65
66
67
68
69
70
71
| package com.example.biji;
import android.content.Intent;
import android.content.SharedPreferences;
import android.os.Bundle;
import android.preference.PreferenceManager;
import android.util.Log;
import android.widget.CompoundButton;
import android.widget.Switch;
import androidx.appcompat.widget.Toolbar;
public class UserSettingsActivity extends BaseActivity {
private Switch nightMode;
private SharedPreferences sharedPreferences;
private Boolean night_change;
@Override
protected void onCreate(Bundle savedInstanceState) {
super.onCreate(savedInstanceState);
setContentView(R.layout.preference_layout);
sharedPreferences = PreferenceManager.getDefaultSharedPreferences(getBaseContext());
Intent intent = getIntent();
initView();
Toolbar myToolbar = (Toolbar) findViewById(R.id.my_toolbar);
setSupportActionBar(myToolbar);
getSupportActionBar().setHomeButtonEnabled(true);
getSupportActionBar().setDisplayHomeAsUpEnabled(true);
if(isNightMode()) myToolbar.setNavigationIcon(getDrawable(R.drawable.ic_settings_white_24dp));
else myToolbar.setNavigationIcon(getDrawable(R.drawable.ic_settings_black_24dp));
}
public void initView(){
nightMode = findViewById(R.id.nightMode);
nightMode.setChecked(sharedPreferences.getBoolean("nightMode", false));
nightMode.setOnCheckedChangeListener(new CompoundButton.OnCheckedChangeListener() {
@Override
public void onCheckedChanged(CompoundButton buttonView, boolean isChecked) {
setNightModePref(isChecked);
setSelfNightMode();
}
});
}
private void setNightModePref(boolean night){
sharedPreferences = PreferenceManager.getDefaultSharedPreferences(getBaseContext());
SharedPreferences.Editor editor = sharedPreferences.edit();
editor.putBoolean("nightMode", night);
editor.commit();
}
private void setSelfNightMode(){
super.setNightMode();
Intent intent = new Intent(this, UserSettingsActivity.class);
startActivity(intent);
finish();
}
}
|
preference_layout.xml
然后要实现这个设置页面 肯定需要有设置页面的前端
1
2
3
4
5
6
7
8
9
10
11
12
13
14
15
16
17
18
19
20
21
22
23
24
25
26
27
28
29
30
31
32
33
34
35
36
37
38
39
40
41
42
43
44
45
46
47
48
49
50
51
52
53
54
55
56
57
58
59
60
61
62
63
| <?xml version="1.0" encoding="utf-8"?>
<LinearLayout xmlns:android="http://schemas.android.com/apk/res/android"
xmlns:app="http://schemas.android.com/apk/res-auto"
android:orientation="vertical"
android:layout_width="match_parent"
android:layout_height="match_parent"
android:background="?attr/lvBackground">
<androidx.appcompat.widget.Toolbar
android:id="@+id/my_toolbar"
android:layout_width="match_parent"
android:layout_height="?attr/actionBarSize"
android:background="?attr/colorPrimary"
android:elevation="4dp"
app:titleTextColor="?attr/titleColor"
app:title="设置"
android:theme="@style/ThemeOverlay.AppCompat.ActionBar"
app:popupTheme="@style/ThemeOverlay.AppCompat.Light"/>
<LinearLayout
android:layout_width="match_parent"
android:layout_height="wrap_content"
android:orientation="horizontal"
android:layout_margin="20dp">
<LinearLayout
android:layout_width="wrap_content"
android:layout_height="match_parent"
android:layout_weight="1"
android:orientation="vertical">
<TextView
android:layout_width="wrap_content"
android:layout_height="wrap_content"
android:text="黑夜模式"
android:textColor="?attr/tvMainColor"
android:textSize="20dp" />
<TextView
android:layout_width="wrap_content"
android:layout_height="wrap_content"
android:text="@string/pref_night_summary"
android:textColor="?attr/tvSubColor"
android:textSize="16dp" />
</LinearLayout>
<Switch
android:id="@+id/nightMode"
android:layout_width="wrap_content"
android:layout_height="match_parent"
android:layout_marginLeft="10dp"
android:layout_marginTop="10dp"
android:clickable="true"
android:gravity="center"
android:switchMinWidth="50dp"
/>
</LinearLayout>
<View
android:layout_width="match_parent"
android:layout_height="1dp"
android:layout_marginLeft="10dp"
android:layout_marginRight="10dp"
android:foreground="@color/greyC"
/>
</LinearLayout>
|
mainactivity
修改设置代码 点击设置字符跳转。
1
2
3
4
5
6
7
8
9
10
11
12
13
14
15
16
17
18
|
setting_image = customView.findViewById(R.id.setting_settings_image);
setting_text = customView.findViewById(R.id.setting_settings_text);
setting_image.setOnClickListener(new View.OnClickListener() {
@Override
public void onClick(View v) {
startActivity(new Intent(MainActivity.this, UserSettingsActivity.class));
}
});
setting_text.setOnClickListener(new View.OnClickListener() {
@Override
public void onClick(View v) {
startActivity(new Intent(MainActivity.this, UserSettingsActivity.class));
}
});
|
设置黑夜模式主题颜色


注意安卓开发过程中有一些部分的颜色会有一些专用名词来指代
重新添加图标并且添加黑夜主体的xml配置文件
theme.xml
1
2
3
4
5
6
7
8
9
10
11
12
13
14
15
16
17
18
19
20
21
22
23
24
25
26
27
28
29
30
31
32
33
34
35
36
37
38
39
40
41
42
43
| <resources xmlns:tools="http://schemas.android.com/tools">
<style name="DayTheme" parent="Theme.AppCompat.DayNight.NoActionBar">
<item name="toolbarTheme">@style/ThemeOverlay.AppCompat.ActionBar</item>
<item name="colorPrimary">@color/white</item>
<item name="android:textColorPrimary">@color/black</item>
<item name="colorPrimaryDark">@color/colorPrimaryDark</item>
<item name="colorAccent">@color/colorAccent</item>
<item name="tvBackground">@color/white</item>
<item name="lvBackground">@color/near_white</item>
<item name="settingIcon">@drawable/ic_settings_black_24dp</item>
<item name="menu_delete_all">@drawable/ic_delete_forever_black_24dp</item>
<item name="menu_delete">@drawable/ic_delete_black_24dp</item>
<item name="menu_search">@drawable/ic_search_black_24dp</item>
<item name="titleColor">@color/black</item>
<item name="tvMainColor">@color/black</item>
<item name="tvSubColor">@color/grey9</item>
<item name="colorControlActivated">@color/black</item>
<item name="colorSwitchThumbNormal">@color/black</item>
</style>
<style name="NightTheme" parent="Theme.AppCompat.DayNight.NoActionBar">
<item name="toolbarTheme">@style/ThemeOverlay.AppCompat.Dark.ActionBar</item>
<item name="colorPrimary">@color/black</item>
<item name="android:textColorPrimary">@color/black</item>
<item name="colorPrimaryDark">@color/colorPrimaryDark</item>
<item name="colorAccent">@color/colorAccent</item>
<item name="tvBackground">@color/black</item>
<item name="lvBackground">@color/near_black</item>
<item name="settingIcon">@drawable/ic_settings_white_24dp</item>
<item name="menu_delete_all">@drawable/ic_delete_forever_white_24dp</item>
<item name="menu_delete">@drawable/ic_delete_white_24dp</item>
<item name="menu_search">@drawable/ic_search_white_24dp</item>
<item name="titleColor">@color/white</item>
<item name="tvMainColor">@color/near_white</item>
<item name="tvSubColor">@color/greyC</item>
<item name="colorControlActivated">@color/white</item>
<item name="colorSwitchThumbNormal">@color/white</item>
</style>
</resources>
|
然后去base里面设置一下 让所有页面创建的时候默认就通过黑夜模式创建
1
2
3
4
5
6
7
8
9
10
11
12
13
14
15
16
17
18
19
20
21
22
23
24
25
26
| package com.example.biji;
import androidx.appcompat.app.AppCompatActivity;
import android.content.SharedPreferences;
import android.os.Bundle;
import android.preference.PreferenceManager;
public class BaseActivity extends AppCompatActivity {
@Override
protected void onCreate(Bundle savedInstanceState){
super.onCreate(savedInstanceState);
setNightMode();
}
public boolean isNightMode(){
SharedPreferences sharedPreferences = PreferenceManager.getDefaultSharedPreferences(getBaseContext());
return sharedPreferences.getBoolean("nightMode", false);
}
public void setNightMode(){
setTheme(R.style.NightTheme);
}
}
|
然后因为弹窗不属于任何一个页面 ,我们需要单独给他设置一个样式
1
2
3
4
5
6
7
8
9
10
11
12
13
14
15
16
17
18
19
20
21
22
23
24
25
26
27
28
29
30
31
32
33
34
35
36
37
38
39
40
41
42
43
44
45
46
47
48
49
50
51
52
53
54
55
56
57
58
59
60
61
62
63
64
| <?xml version="1.0" encoding="utf-8"?>
<LinearLayout xmlns:android="http://schemas.android.com/apk/res/android"
xmlns:app="http://schemas.android.com/apk/res-auto"
android:orientation="vertical"
android:layout_width="match_parent"
android:layout_height="match_parent"
android:background="?attr/lvBackground"> 在这里加
<androidx.appcompat.widget.Toolbar
android:layout_width="match_parent"
android:layout_height="?attr/actionBarSize"
android:background="?attr/colorPrimary"
android:elevation="4dp"
android:theme="@style/ThemeOverlay.AppCompat.ActionBar"
app:popupTheme="@style/ThemeOverlay.AppCompat.Light"
app:title="弹出菜单"
app:titleTextColor="?attr/titleColor"
/>
<LinearLayout
android:layout_width="match_parent"
android:layout_height="wrap_content"
android:focusable="true"
android:focusableInTouchMode="true"
android:clickable="true"
android:orientation="vertical">
<LinearLayout
android:layout_width="match_parent"
android:layout_height="48dp"
android:orientation="horizontal"
>
<ImageView
android:id="@+id/setting_settings_image"
android:layout_width="wrap_content"
android:layout_height="wrap_content"
android:layout_margin="10dp"
android:src="?attr/settingIcon"
android:layout_gravity="center"
/>
<TextView
android:id="@+id/setting_settings_text"
android:layout_width="wrap_content"
android:layout_height="wrap_content"
android:text="设置"
android:textColor="?attr/tvMainColor"
android:layout_marginLeft="10dp"
android:layout_weight="1"
android:layout_gravity="center"
android:textSize="24dp"/>
</LinearLayout>
<ImageView
android:layout_width="match_parent"
android:layout_height="1dp"
android:background="@color/black"
android:alpha="0.2"/>
<ListView
android:id="@+id/lv_tag"
android:layout_width="match_parent"
android:layout_height="wrap_content">
</ListView>
</LinearLayout>
</LinearLayout>
|
baseactivity
1
2
3
4
5
6
7
8
9
10
11
12
13
14
15
16
17
18
19
20
21
22
23
24
25
26
27
28
29
30
31
32
33
34
35
| package com.example.biji;
import androidx.appcompat.app.AppCompatActivity;
import android.content.SharedPreferences;
import android.os.Bundle;
import android.preference.PreferenceManager;
import android.util.Log;
public class BaseActivity extends AppCompatActivity {
private static final String TAG = "BaseActivity";
@Override
protected void onCreate(Bundle savedInstanceState){
super.onCreate(savedInstanceState);
setNightMode();
}
public boolean isNightMode(){
SharedPreferences sharedPreferences = PreferenceManager.getDefaultSharedPreferences(getBaseContext());
return sharedPreferences.getBoolean("nightMode", false);
}
public void setNightMode() {
if (isNightMode()) {
Log.d(TAG, "Night mode enabled");
setTheme(R.style.NightTheme);
} else {
Log.d(TAG, "Day mode enabled");
setTheme(R.style.DayTheme);
}
}
}
|
做好了 结课
课外专题
根据老师的要求,加上单词本和答题功能。
英语词汇助手功能
功能概述
英语词汇助手是一个帮助用户学习和记忆英语单词的功能模块,主要包含以下功能:
单词本:存储和管理用户添加的英语单词
单词查询:通过网络API获取单词释义、例句和音标
单词测试:针对已添加的单词进行记忆测试
学习计划:设置每日学习单词数量和提醒
单词数据模型设计
首先我们需要创建一个单词的数据模型,用于存储单词相关信息:
1
2
3
4
5
6
7
8
9
10
11
12
13
14
15
16
17
18
19
20
21
22
23
24
25
26
27
28
29
30
31
32
33
34
35
36
37
38
39
40
41
42
43
44
45
| package com.example.biji.vocabulary;
public class Word {
private long id;
private String word;
private String phonetic;
private String definition;
private String example;
private int familiarity;
private String addTime;
public Word() { }
public Word(String word, String phonetic, String definition, String example, int familiarity, String addTime) {
this.word = word;
this.phonetic = phonetic;
this.definition = definition;
this.example = example;
this.familiarity = familiarity;
this.addTime = addTime;
}
public long getId() { return id; }
public void setId(long id) { this.id = id; }
public String getWord() { return word; }
public void setWord(String word) { this.word = word; }
public String getPhonetic() { return phonetic; }
public void setPhonetic(String phonetic) { this.phonetic = phonetic; }
public String getDefinition() { return definition; }
public void setDefinition(String definition) { this.definition = definition; }
public String getExample() { return example; }
public void setExample(String example) { this.example = example; }
public int getFamiliarity() { return familiarity; }
public void setFamiliarity(int familiarity) { this.familiarity = familiarity; }
public String getAddTime() { return addTime; }
public void setAddTime(String addTime) { this.addTime = addTime; }
}
|
数据库设计
接下来创建单词的数据库表结构:
1
2
3
4
5
6
7
8
9
10
11
12
13
14
15
16
17
18
19
20
21
22
23
24
25
26
27
28
29
30
31
32
33
34
35
36
37
38
39
40
41
42
43
44
45
| package com.example.biji.vocabulary;
import android.content.Context;
import android.database.sqlite.SQLiteDatabase;
import android.database.sqlite.SQLiteOpenHelper;
public class WordDatabase extends SQLiteOpenHelper {
public static final String TABLE_NAME = "words";
public static final String ID = "_id";
public static final String WORD = "word";
public static final String PHONETIC = "phonetic";
public static final String DEFINITION = "definition";
public static final String EXAMPLE = "example";
public static final String FAMILIARITY = "familiarity";
public static final String ADD_TIME = "add_time";
public WordDatabase(Context context) {
super(context, "vocabulary.db", null, 1);
}
@Override
public void onCreate(SQLiteDatabase db) {
db.execSQL("CREATE TABLE " + TABLE_NAME
+ "("
+ ID + " INTEGER PRIMARY KEY AUTOINCREMENT,"
+ WORD + " TEXT UNIQUE NOT NULL,"
+ PHONETIC + " TEXT,"
+ DEFINITION + " TEXT NOT NULL,"
+ EXAMPLE + " TEXT,"
+ FAMILIARITY + " INTEGER DEFAULT 0,"
+ ADD_TIME + " TEXT NOT NULL)"
);
}
@Override
public void onUpgrade(SQLiteDatabase db, int oldVersion, int newVersion) {
if (oldVersion < newVersion) {
}
}
}
|
单词数据操作类
创建一个类用于处理单词的CRUD操作:
1
2
3
4
5
6
7
8
9
10
11
12
13
14
15
16
17
18
19
20
21
22
23
24
25
26
27
28
29
30
31
32
33
34
35
36
37
38
39
40
41
42
43
44
45
46
47
48
49
50
51
52
53
54
55
56
57
58
59
60
61
62
63
64
65
66
67
68
69
70
71
72
73
74
75
76
77
78
79
80
81
82
83
84
85
86
87
88
89
90
91
92
93
94
95
96
97
98
99
100
101
102
103
104
105
106
107
108
109
110
111
112
113
114
115
116
117
118
119
120
121
122
123
124
125
126
127
128
129
130
131
132
133
134
135
136
137
138
139
140
141
142
143
144
145
146
| package com.example.biji.vocabulary;
import android.content.ContentValues;
import android.content.Context;
import android.database.Cursor;
import android.database.sqlite.SQLiteDatabase;
import java.util.ArrayList;
import java.util.List;
public class WordCRUD {
private WordDatabase dbHandler;
private SQLiteDatabase db;
private static final String[] columns = {
WordDatabase.ID,
WordDatabase.WORD,
WordDatabase.PHONETIC,
WordDatabase.DEFINITION,
WordDatabase.EXAMPLE,
WordDatabase.FAMILIARITY,
WordDatabase.ADD_TIME
};
public WordCRUD(Context context) {
dbHandler = new WordDatabase(context);
}
public void open() {
db = dbHandler.getWritableDatabase();
}
public void close() {
dbHandler.close();
}
public Word addWord(Word word) {
ContentValues values = new ContentValues();
values.put(WordDatabase.WORD, word.getWord());
values.put(WordDatabase.PHONETIC, word.getPhonetic());
values.put(WordDatabase.DEFINITION, word.getDefinition());
values.put(WordDatabase.EXAMPLE, word.getExample());
values.put(WordDatabase.FAMILIARITY, word.getFamiliarity());
values.put(WordDatabase.ADD_TIME, word.getAddTime());
long insertId = db.insert(WordDatabase.TABLE_NAME, null, values);
word.setId(insertId);
return word;
}
public Word getWord(long id) {
Cursor cursor = db.query(WordDatabase.TABLE_NAME, columns,
WordDatabase.ID + "=?",
new String[] {String.valueOf(id)},
null, null, null, null);
if (cursor != null) cursor.moveToFirst();
Word word = new Word();
word.setId(cursor.getLong(0));
word.setWord(cursor.getString(1));
word.setPhonetic(cursor.getString(2));
word.setDefinition(cursor.getString(3));
word.setExample(cursor.getString(4));
word.setFamiliarity(cursor.getInt(5));
word.setAddTime(cursor.getString(6));
return word;
}
public List<Word> getAllWords() {
List<Word> wordList = new ArrayList<>();
Cursor cursor = db.query(WordDatabase.TABLE_NAME, columns,
null, null, null, null,
WordDatabase.FAMILIARITY + " ASC");
if (cursor.getCount() > 0) {
while (cursor.moveToNext()) {
Word word = new Word();
word.setId(cursor.getLong(0));
word.setWord(cursor.getString(1));
word.setPhonetic(cursor.getString(2));
word.setDefinition(cursor.getString(3));
word.setExample(cursor.getString(4));
word.setFamiliarity(cursor.getInt(5));
word.setAddTime(cursor.getString(6));
wordList.add(word);
}
}
return wordList;
}
public int updateWord(Word word) {
ContentValues values = new ContentValues();
values.put(WordDatabase.WORD, word.getWord());
values.put(WordDatabase.PHONETIC, word.getPhonetic());
values.put(WordDatabase.DEFINITION, word.getDefinition());
values.put(WordDatabase.EXAMPLE, word.getExample());
values.put(WordDatabase.FAMILIARITY, word.getFamiliarity());
values.put(WordDatabase.ADD_TIME, word.getAddTime());
return db.update(WordDatabase.TABLE_NAME, values,
WordDatabase.ID + "=?",
new String[] {String.valueOf(word.getId())});
}
public void removeWord(Word word) {
db.delete(WordDatabase.TABLE_NAME,
WordDatabase.ID + "=?",
new String[] {String.valueOf(word.getId())});
}
public Word findWordByText(String wordText) {
Cursor cursor = db.query(WordDatabase.TABLE_NAME, columns,
WordDatabase.WORD + "=?",
new String[] {wordText},
null, null, null, null);
if (cursor != null && cursor.moveToFirst()) {
Word word = new Word();
word.setId(cursor.getLong(0));
word.setWord(cursor.getString(1));
word.setPhonetic(cursor.getString(2));
word.setDefinition(cursor.getString(3));
word.setExample(cursor.getString(4));
word.setFamiliarity(cursor.getInt(5));
word.setAddTime(cursor.getString(6));
return word;
}
return null;
}
}
|
单词列表界面
创建一个展示所有单词的列表界面:
1
2
3
4
5
6
7
8
9
10
11
12
13
14
15
16
17
18
19
20
21
22
23
24
25
26
27
28
29
30
31
32
33
34
35
36
37
38
39
40
| <!-- word_list_layout.xml -->
<?xml version="1.0" encoding="utf-8"?>
<RelativeLayout xmlns:android="http://schemas.android.com/apk/res/android"
xmlns:app="http://schemas.android.com/apk/res-auto"
android:layout_width="match_parent"
android:layout_height="match_parent"
android:background="?attr/lvBackground">
<androidx.appcompat.widget.Toolbar
android:id="@+id/word_toolbar"
android:layout_width="match_parent"
android:layout_height="?attr/actionBarSize"
android:background="?attr/colorPrimary"
android:elevation="4dp"
app:title="词汇助手"
app:titleTextColor="?attr/titleColor"
android:theme="?attr/toolbarTheme"
app:popupTheme="@style/ThemeOverlay.AppCompat.Light" />
<ListView
android:id="@+id/word_list_view"
android:layout_width="match_parent"
android:layout_height="match_parent"
android:layout_below="@id/word_toolbar"
android:divider="@android:color/darker_gray"
android:dividerHeight="1dp"
android:padding="8dp" />
<com.google.android.material.floatingactionbutton.FloatingActionButton
android:id="@+id/add_word_fab"
android:layout_width="wrap_content"
android:layout_height="wrap_content"
android:layout_alignParentEnd="true"
android:layout_alignParentBottom="true"
android:layout_margin="16dp"
android:clickable="true"
android:contentDescription="添加单词"
app:srcCompat="@drawable/baseline_add_24" />
</RelativeLayout>
|
单词项布局
为ListView中的每个单词项创建布局
1
2
3
4
5
6
7
8
9
10
11
12
13
14
15
16
17
18
19
20
21
22
23
24
25
26
27
28
29
30
31
32
33
34
35
36
37
38
39
40
41
42
43
44
45
46
47
48
49
50
51
52
53
54
55
56
57
58
59
60
61
62
63
64
65
66
67
68
69
70
| <!-- word_item_layout.xml -->
<?xml version="1.0" encoding="utf-8"?>
<LinearLayout xmlns:android="http://schemas.android.com/apk/res/android"
android:layout_width="match_parent"
android:layout_height="wrap_content"
android:orientation="vertical"
android:padding="12dp"
android:background="@drawable/word_item_bg">
<LinearLayout
android:layout_width="match_parent"
android:layout_height="wrap_content"
android:orientation="horizontal">
<TextView
android:id="@+id/tv_word"
android:layout_width="0dp"
android:layout_height="wrap_content"
android:layout_weight="1"
android:text="Word"
android:textColor="?attr/tvMainColor"
android:textSize="18sp"
android:textStyle="bold" />
<TextView
android:id="@+id/tv_phonetic"
android:layout_width="wrap_content"
android:layout_height="wrap_content"
android:text="[fəˈnetɪk]"
android:textColor="?attr/tvSubColor"
android:textSize="16sp" />
</LinearLayout>
<TextView
android:id="@+id/tv_definition"
android:layout_width="match_parent"
android:layout_height="wrap_content"
android:layout_marginTop="4dp"
android:text="Definition"
android:textColor="?attr/tvMainColor"
android:textSize="14sp"
android:maxLines="2"
android:ellipsize="end" />
<LinearLayout
android:layout_width="match_parent"
android:layout_height="wrap_content"
android:layout_marginTop="6dp"
android:orientation="horizontal">
<TextView
android:id="@+id/tv_time"
android:layout_width="0dp"
android:layout_height="wrap_content"
android:layout_weight="1"
android:text="2025-03-15"
android:textColor="?attr/tvSubColor"
android:textSize="12sp" />
<RatingBar
android:id="@+id/rb_familiarity"
style="?android:attr/ratingBarStyleSmall"
android:layout_width="wrap_content"
android:layout_height="wrap_content"
android:layout_gravity="center_vertical"
android:numStars="5"
android:stepSize="1"
android:rating="3" />
</LinearLayout>
</LinearLayout>
|
单词适配器
创建一个适配器用于将单词数据显示在ListView中:
1
2
3
4
5
6
7
8
9
10
11
12
13
14
15
16
17
18
19
20
21
22
23
24
25
26
27
28
29
30
31
32
33
34
35
36
37
38
39
40
41
42
43
44
45
46
47
48
49
50
51
52
53
54
55
56
57
58
59
60
61
62
63
64
65
66
67
68
69
70
71
72
73
74
75
76
77
78
79
80
81
82
83
84
85
86
87
88
89
90
91
92
93
94
95
96
97
98
99
100
101
102
103
104
105
106
107
108
109
110
111
112
113
114
115
116
117
118
119
120
121
122
123
| package com.example.biji.vocabulary;
import android.content.Context;
import android.view.LayoutInflater;
import android.view.View;
import android.view.ViewGroup;
import android.widget.BaseAdapter;
import android.widget.Filter;
import android.widget.Filterable;
import android.widget.RatingBar;
import android.widget.TextView;
import com.example.biji.R;
import java.util.ArrayList;
import java.util.List;
public class WordAdapter extends BaseAdapter implements Filterable {
private Context context;
private List<Word> wordList;
private List<Word> originalWordList;
private WordFilter wordFilter;
public WordAdapter(Context context, List<Word> wordList) {
this.context = context;
this.wordList = wordList;
this.originalWordList = new ArrayList<>(wordList);
}
@Override
public int getCount() {
return wordList.size();
}
@Override
public Object getItem(int position) {
return wordList.get(position);
}
@Override
public long getItemId(int position) {
return wordList.get(position).getId();
}
@Override
public View getView(int position, View convertView, ViewGroup parent) {
ViewHolder holder;
if (convertView == null) {
convertView = LayoutInflater.from(context).inflate(R.layout.word_item_layout, parent, false);
holder = new ViewHolder();
holder.tvWord = convertView.findViewById(R.id.tv_word);
holder.tvPhonetic = convertView.findViewById(R.id.tv_phonetic);
holder.tvDefinition = convertView.findViewById(R.id.tv_definition);
holder.tvTime = convertView.findViewById(R.id.tv_time);
holder.rbFamiliarity = convertView.findViewById(R.id.rb_familiarity);
convertView.setTag(holder);
} else {
holder = (ViewHolder) convertView.getTag();
}
Word word = wordList.get(position);
holder.tvWord.setText(word.getWord());
holder.tvPhonetic.setText(word.getPhonetic());
holder.tvDefinition.setText(word.getDefinition());
holder.tvTime.setText(word.getAddTime());
holder.rbFamiliarity.setRating(word.getFamiliarity());
return convertView;
}
static class ViewHolder {
TextView tvWord;
TextView tvPhonetic;
TextView tvDefinition;
TextView tvTime;
RatingBar rbFamiliarity;
}
@Override
public Filter getFilter() {
if (wordFilter == null) {
wordFilter = new WordFilter();
}
return wordFilter;
}
private class WordFilter extends Filter {
@Override
protected FilterResults performFiltering(CharSequence constraint) {
FilterResults results = new FilterResults();
if (constraint == null || constraint.length() == 0) {
results.values = new ArrayList<>(originalWordList);
results.count = originalWordList.size();
} else {
String filterString = constraint.toString().toLowerCase();
List<Word> filteredList = new ArrayList<>();
for (Word word : originalWordList) {
if (word.getWord().toLowerCase().contains(filterString) ||
word.getDefinition().toLowerCase().contains(filterString)) {
filteredList.add(word);
}
}
results.values = filteredList;
results.count = filteredList.size();
}
return results;
}
@Override
@SuppressWarnings("unchecked")
protected void publishResults(CharSequence constraint, FilterResults results) {
wordList = (List<Word>) results.values;
notifyDataSetChanged();
}
}
}
|
单词列表Activity
实现单词列表的Activity:
1
2
3
4
5
6
7
8
9
10
11
12
13
14
15
16
17
18
19
20
21
22
23
24
25
26
27
28
29
30
31
32
33
34
35
36
37
38
39
40
41
42
43
44
45
46
47
48
49
50
51
52
53
54
55
56
57
58
59
60
61
62
63
64
65
66
67
68
69
70
71
72
73
74
75
76
77
78
79
80
81
82
83
84
85
86
87
88
89
90
91
92
93
94
95
96
97
98
99
100
101
102
103
104
105
106
107
108
109
110
111
112
113
114
115
116
117
118
119
120
121
122
123
124
125
126
127
128
129
130
131
| package com.example.biji.vocabulary;
import android.content.Intent;
import android.os.Bundle;
import android.view.Menu;
import android.view.MenuItem;
import android.view.View;
import android.widget.AdapterView;
import android.widget.ListView;
import androidx.annotation.NonNull;
import androidx.appcompat.widget.SearchView;
import androidx.appcompat.widget.Toolbar;
import com.example.biji.BaseActivity;
import com.example.biji.R;
import com.google.android.material.floatingactionbutton.FloatingActionButton;
import java.util.ArrayList;
import java.util.List;
public class WordListActivity extends BaseActivity {
private ListView wordListView;
private WordAdapter adapter;
private List<Word> wordList;
private WordCRUD wordCRUD;
private FloatingActionButton addWordFab;
private Toolbar toolbar;
@Override
protected void onCreate(Bundle savedInstanceState) {
super.onCreate(savedInstanceState);
setContentView(R.layout.word_list_layout);
toolbar = findViewById(R.id.word_toolbar);
setSupportActionBar(toolbar);
getSupportActionBar().setDisplayHomeAsUpEnabled(true);
wordListView = findViewById(R.id.word_list_view);
addWordFab = findViewById(R.id.add_word_fab);
wordList = new ArrayList<>();
adapter = new WordAdapter(this, wordList);
wordListView.setAdapter(adapter);
wordCRUD = new WordCRUD(this);
loadWords();
addWordFab.setOnClickListener(new View.OnClickListener() {
@Override
public void onClick(View v) {
Intent intent = new Intent(WordListActivity.this, AddWordActivity.class);
startActivityForResult(intent, 0);
}
});
wordListView.setOnItemClickListener(new AdapterView.OnItemClickListener() {
@Override
public void onItemClick(AdapterView<?> parent, View view, int position, long id) {
Word word = wordList.get(position);
Intent intent = new Intent(WordListActivity.this, WordDetailActivity.class);
intent.putExtra("word_id", word.getId());
startActivityForResult(intent, 1);
}
});
}
private void loadWords() {
wordCRUD.open();
wordList.clear();
wordList.addAll(wordCRUD.getAllWords());
wordCRUD.close();
adapter.notifyDataSetChanged();
}
@Override
protected void onActivityResult(int requestCode, int resultCode, Intent data) {
super.onActivityResult(requestCode, resultCode, data);
if (resultCode == RESULT_OK) {
loadWords();
}
}
@Override
public boolean onCreateOptionsMenu(Menu menu) {
getMenuInflater().inflate(R.menu.word_list_menu, menu);
MenuItem searchItem = menu.findItem(R.id.action_search_word);
SearchView searchView = (SearchView) searchItem.getActionView();
searchView.setQueryHint("搜索单词或释义");
searchView.setOnQueryTextListener(new SearchView.OnQueryTextListener() {
@Override
public boolean onQueryTextSubmit(String query) {
return false;
}
@Override
public boolean onQueryTextChange(String newText) {
adapter.getFilter().filter(newText);
return true;
}
});
return true;
}
@Override
public boolean onOptionsItemSelected(@NonNull MenuItem item) {
switch (item.getItemId()) {
case android.R.id.home:
finish();
return true;
case R.id.action_test:
startActivity(new Intent(this, WordTestActivity.class));
return true;
}
return super.onOptionsItemSelected(item);
}
}
|
单词详情页面
创建一个用于显示单词详细信息的界面
1
2
3
4
5
6
7
8
9
10
11
12
13
14
15
16
17
18
19
20
21
22
23
24
25
26
27
28
29
30
31
32
33
34
35
36
37
38
39
40
41
42
43
44
45
46
47
48
49
50
51
52
53
54
55
56
57
58
59
60
61
62
63
64
65
66
67
68
69
70
71
72
73
74
75
76
77
78
79
80
81
82
83
84
85
86
87
88
89
90
91
92
93
94
95
96
97
98
99
100
101
102
103
104
105
106
107
108
109
110
111
112
113
114
115
116
117
118
119
|
<?xml version="1.0" encoding="utf-8"?>
<LinearLayout xmlns:android="http://schemas.android.com/apk/res/android"
xmlns:app="http://schemas.android.com/apk/res-auto"
android:layout_width="match_parent"
android:layout_height="match_parent"
android:orientation="vertical"
android:background="?attr/lvBackground">
<androidx.appcompat.widget.Toolbar
android:id="@+id/word_detail_toolbar"
android:layout_width="match_parent"
android:layout_height="?attr/actionBarSize"
android:background="?attr/colorPrimary"
android:elevation="4dp"
app:titleTextColor="?attr/titleColor"
android:theme="?attr/toolbarTheme"
app:popupTheme="@style/ThemeOverlay.AppCompat.Light" />
<ScrollView
android:layout_width="match_parent"
android:layout_height="match_parent">
<LinearLayout
android:layout_width="match_parent"
android:layout_height="wrap_content"
android:orientation="vertical"
android:padding="16dp">
<TextView
android:id="@+id/tv_detail_word"
android:layout_width="match_parent"
android:layout_height="wrap_content"
android:text="Word"
android:textColor="?attr/tvMainColor"
android:textSize="28sp"
android:textStyle="bold" />
<TextView
android:id="@+id/tv_detail_phonetic"
android:layout_width="match_parent"
android:layout_height="wrap_content"
android:layout_marginTop="8dp"
android:text="[fəˈnetɪk]"
android:textColor="?attr/tvSubColor"
android:textSize="18sp" />
<TextView
android:layout_width="match_parent"
android:layout_height="wrap_content"
android:layout_marginTop="16dp"
android:text="释义"
android:textColor="?attr/tvMainColor"
android:textSize="16sp"
android:textStyle="bold" />
<TextView
android:id="@+id/tv_detail_definition"
android:layout_width="match_parent"
android:layout_height="wrap_content"
android:layout_marginTop="8dp"
android:text="Definition"
android:textColor="?attr/tvMainColor"
android:textSize="16sp" />
<TextView
android:layout_width="match_parent"
android:layout_height="wrap_content"
android:layout_marginTop="16dp"
android:text="例句"
android:textColor="?attr/tvMainColor"
android:textSize="16sp"
android:textStyle="bold" />
<TextView
android:id="@+id/tv_detail_example"
android:layout_width="match_parent"
android:layout_height="wrap_content"
android:layout_marginTop="8dp"
android:text="Example sentence"
android:textColor="?attr/tvMainColor"
android:textSize="16sp" />
<TextView
android:layout_width="match_parent"
android:layout_height="wrap_content"
android:layout_marginTop="16dp"
android:text="熟悉度"
android:textColor="?attr/tvMainColor"
android:textSize="16sp"
android:textStyle="bold" />
<RatingBar
android:id="@+id/rb_detail_familiarity"
android:layout_width="wrap_content"
android:layout_height="wrap_content"
android:layout_marginTop="8dp"
android:numStars="5"
android:stepSize="1"
android:rating="3" />
<Button
android:id="@+id/btn_update_familiarity"
android:layout_width="match_parent"
android:layout_height="wrap_content"
android:layout_marginTop="16dp"
android:text="更新熟悉度" />
<Button
android:id="@+id/btn_delete_word"
android:layout_width="match_parent"
android:layout_height="wrap_content"
android:layout_marginTop="8dp"
android:backgroundTint="#FF5252"
android:text="删除单词" />
</LinearLayout>
</ScrollView>
</LinearLayout>
|
添加单词功能
创建一个用于添加新单词的界面:
1
2
3
4
5
6
7
8
9
10
11
12
13
14
15
16
17
18
19
20
21
22
23
24
25
26
27
28
29
30
31
32
33
34
35
36
37
38
39
40
41
42
43
44
45
46
47
48
49
50
51
52
53
54
55
56
57
58
59
60
61
62
63
64
65
66
67
68
69
70
71
72
73
74
75
76
77
78
79
80
81
82
83
84
85
86
87
88
89
90
91
92
93
94
95
96
97
98
99
100
101
|
<?xml version="1.0" encoding="utf-8"?>
<LinearLayout xmlns:android="http://schemas.android.com/apk/res/android"
xmlns:app="http://schemas.android.com/apk/res-auto"
android:layout_width="match_parent"
android:layout_height="match_parent"
android:orientation="vertical"
android:background="?attr/lvBackground">
<androidx.appcompat.widget.Toolbar
android:id="@+id/add_word_toolbar"
android:layout_width="match_parent"
android:layout_height="?attr/actionBarSize"
android:background="?attr/colorPrimary"
android:elevation="4dp"
app:title="添加单词"
app:titleTextColor="?attr/titleColor"
android:theme="?attr/toolbarTheme"
app:popupTheme="@style/ThemeOverlay.AppCompat.Light" />
<ScrollView
android:layout_width="match_parent"
android:layout_height="match_parent">
<LinearLayout
android:layout_width="match_parent"
android:layout_height="wrap_content"
android:orientation="vertical"
android:padding="16dp">
<com.google.android.material.textfield.TextInputLayout
android:layout_width="match_parent"
android:layout_height="wrap_content"
android:layout_marginTop="8dp">
<EditText
android:id="@+id/et_add_word"
android:layout_width="match_parent"
android:layout_height="wrap_content"
android:hint="单词"
android:inputType="text" />
</com.google.android.material.textfield.TextInputLayout>
<com.google.android.material.textfield.TextInputLayout
android:layout_width="match_parent"
android:layout_height="wrap_content"
android:layout_marginTop="16dp">
<EditText
android:id="@+id/et_add_phonetic"
android:layout_width="match_parent"
android:layout_height="wrap_content"
android:hint="音标"
android:inputType="text" />
</com.google.android.material.textfield.TextInputLayout>
<com.google.android.material.textfield.TextInputLayout
android:layout_width="match_parent"
android:layout_height="wrap_content"
android:layout_marginTop="16dp">
<EditText
android:id="@+id/et_add_definition"
android:layout_width="match_parent"
android:layout_height="wrap_content"
android:hint="释义"
android:inputType="textMultiLine"
android:minLines="3" />
</com.google.android.material.textfield.TextInputLayout>
<com.google.android.material.textfield.TextInputLayout
android:layout_width="match_parent"
android:layout_height="wrap_content"
android:layout_marginTop="16dp">
<EditText
android:id="@+id/et_add_example"
android:layout_width="match_parent"
android:layout_height="wrap_content"
android:hint="例句"
android:inputType="textMultiLine"
android:minLines="2" />
</com.google.android.material.textfield.TextInputLayout>
<Button
android:id="@+id/btn_search_word"
android:layout_width="match_parent"
android:layout_height="wrap_content"
android:layout_marginTop="16dp"
android:text="在线查询" />
<Button
android:id="@+id/btn_save_word"
android:layout_width="match_parent"
android:layout_height="wrap_content"
android:layout_marginTop="16dp"
android:text="保存单词" />
</LinearLayout>
</ScrollView>
</LinearLayout>
|